
Introduction
Pricing events allow organizations to run special offers during festive seasons. Each pricing event is linked to a specific discount, which determines the discount value applied to items during the event.
The user needs to assign an event to a specific discount first at Plum so that during the event duration, the user will be able to apply that discount on a check at Terminal. That discount would be only applicable until the duration of the assigned event otherwise it needs manager authorization before applying. If the discount period ends then it will not be applicable during the event duration as well.
How to add a new Event ?
To add a new Event, the user needs to click on Add [button] under the Events module.
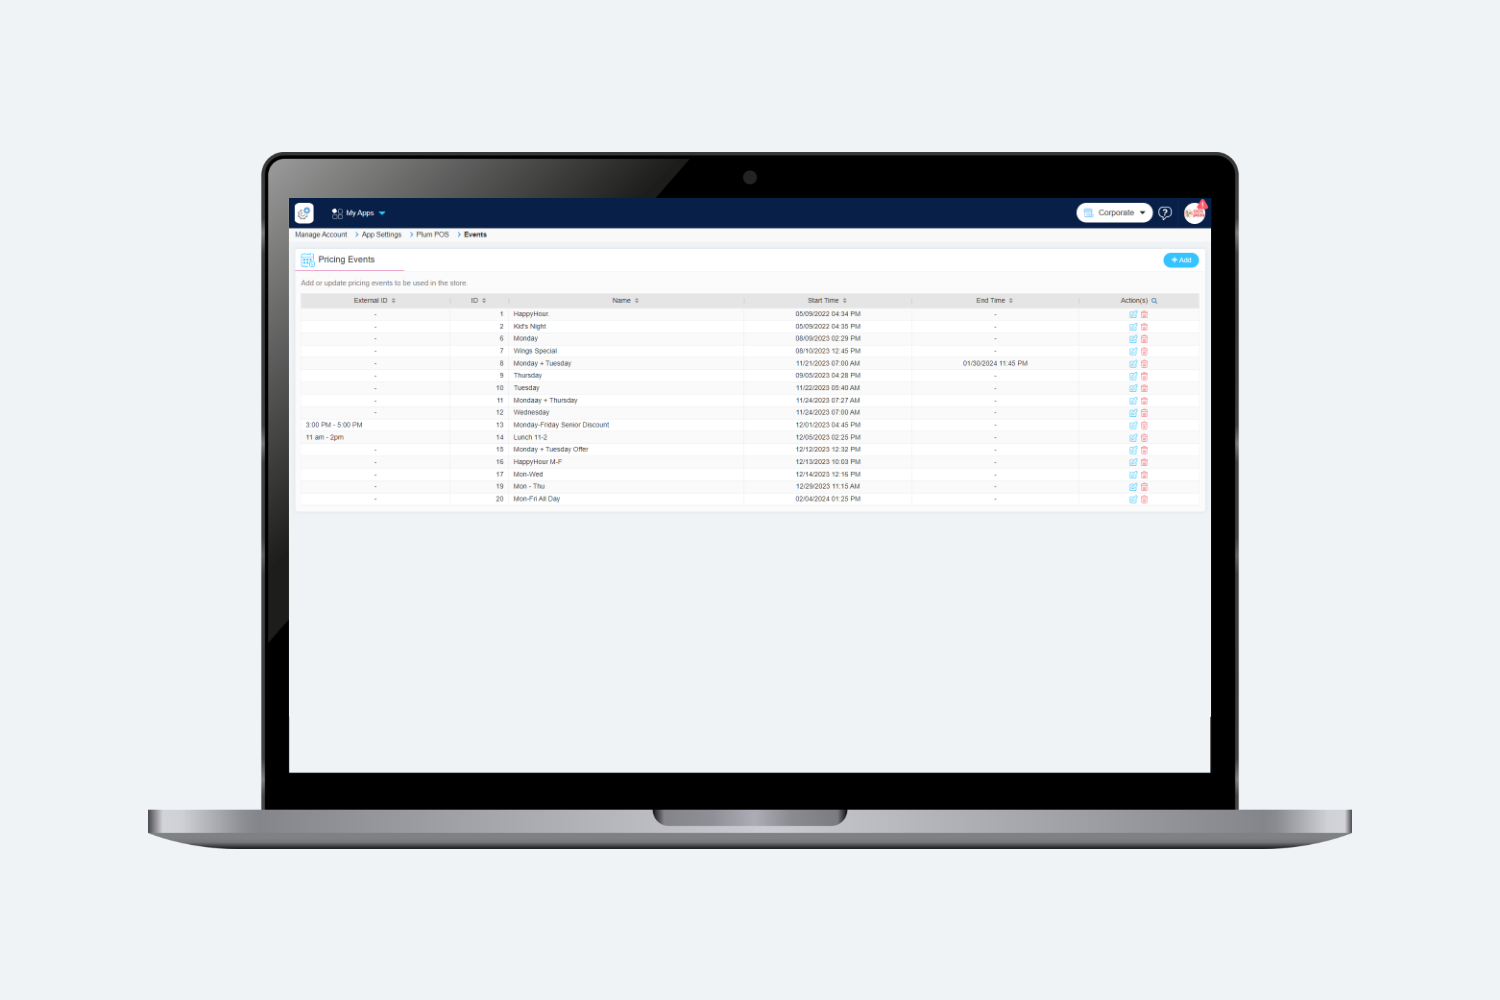
After clicking on Add, the user needs to fill up all the mandatory fields.

In this screen users can see the fields like Name, External ID, Start Time and End Time.

- Name: Enter the name of the Event.
- External ID: It is for external mapping purpose.
- Start Time: Set the start date & time of the event.
- End Time: Set the end date & time of the event.
Event Schedule
On Event Schedule[tab], user can set the day wise timing for the event.
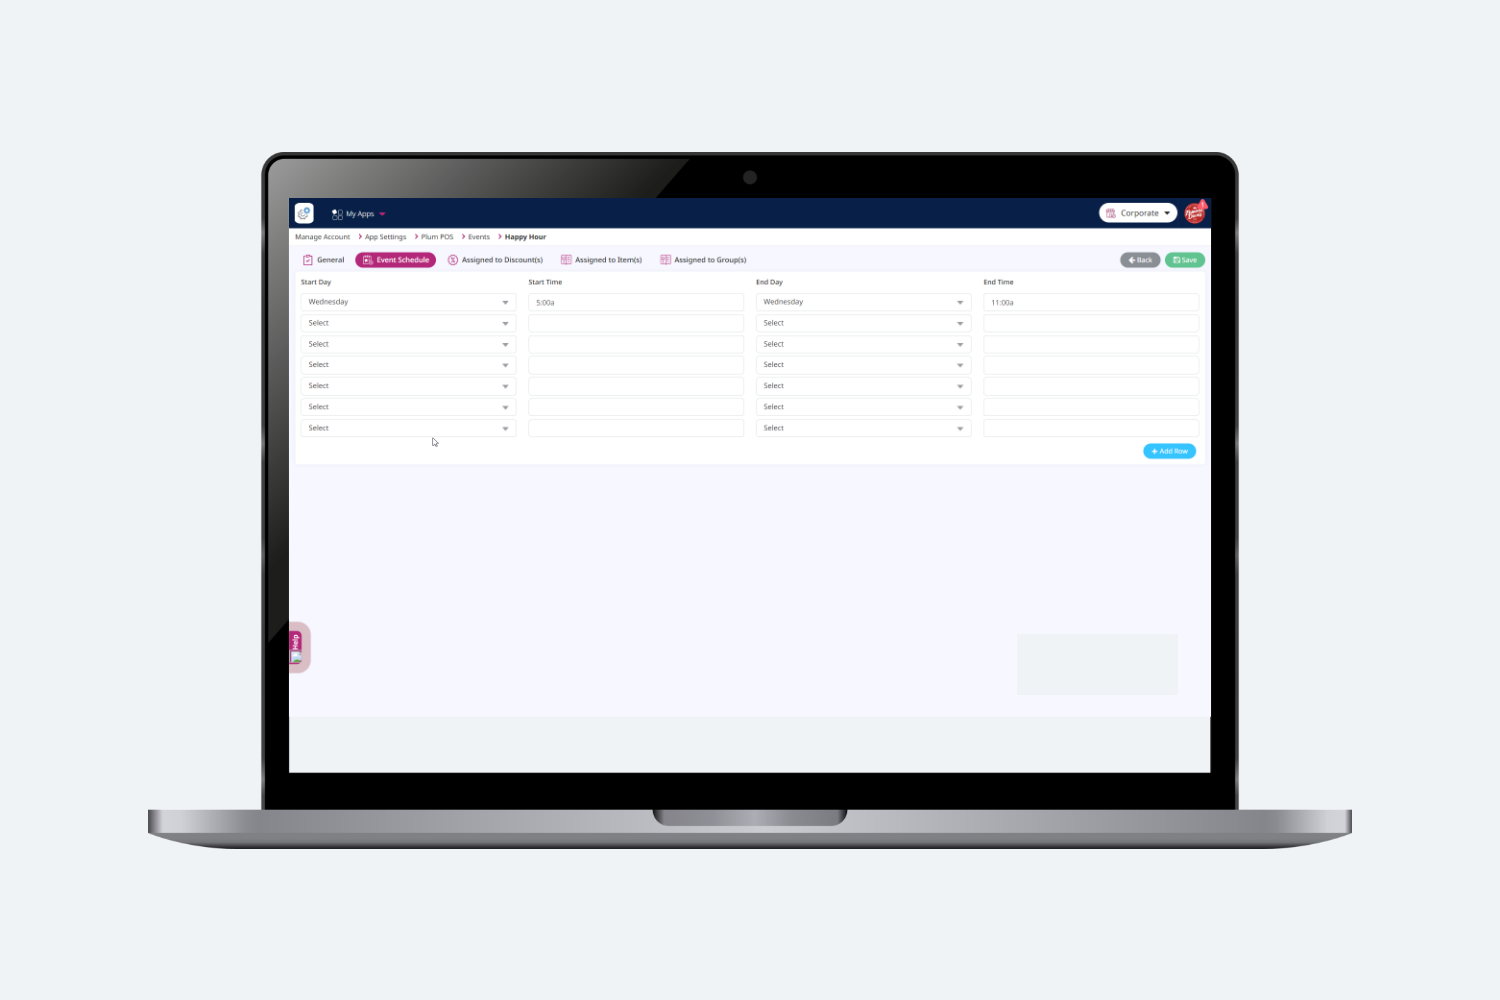
- Start Day:Select the start day of the event.
- Start Time: Set the start time of the event from the selected start day.
- End Day: Select the end day of the event.
- End Time: Set the end time of the event till the selected end day.
- Add Row: Users can add more rows as per their use
Assigned to Discount(s)
On Assigned to Discount(s) [tab], users will be able to see the discounts on which this event is assigned.

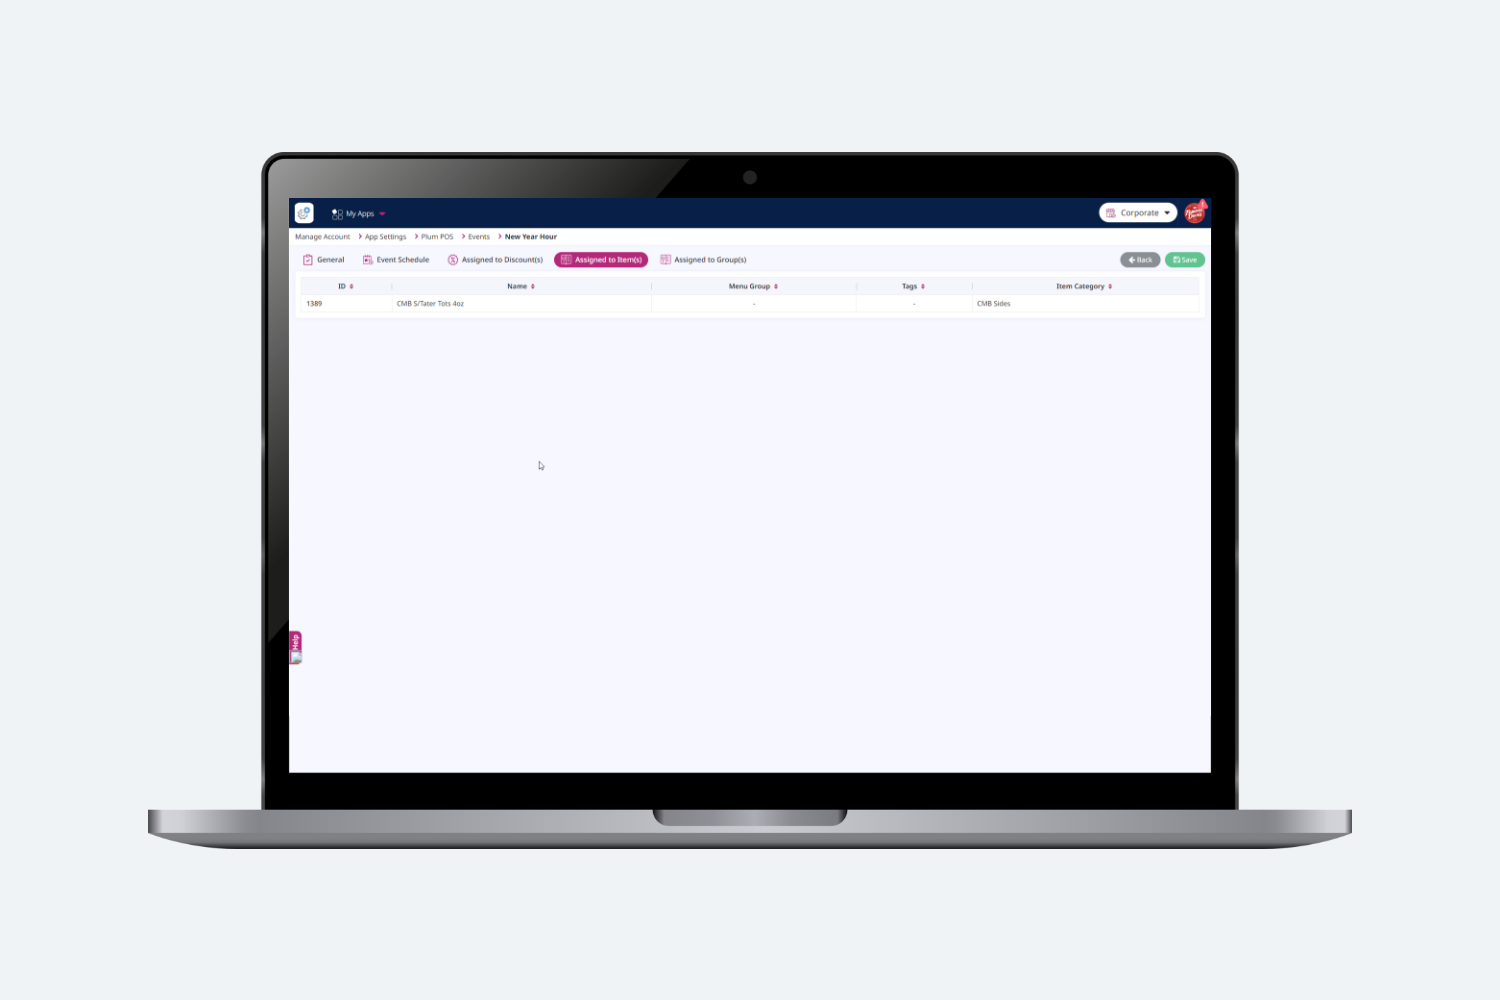
Assigned to Item(s)
On Assigned to Item(s) [tab], users can view the list of corresponding items assigned to the discounts listed under the “Assigned to Discount(s)” [tab]. This allows users to easily track which items are associated with specific discounts.
Assigned to Group(s)
On Assigned to Group(s) [Tab], users can view the list of corresponding Groups in which the event is assigned. This allows users to easily track which groups are associated with specific events.