Introduction
In Plum Point of Sale, we have different functions to perform, and we have categorized them into two categories:
- General Functions
- Manager Functions
General Crew Functions:
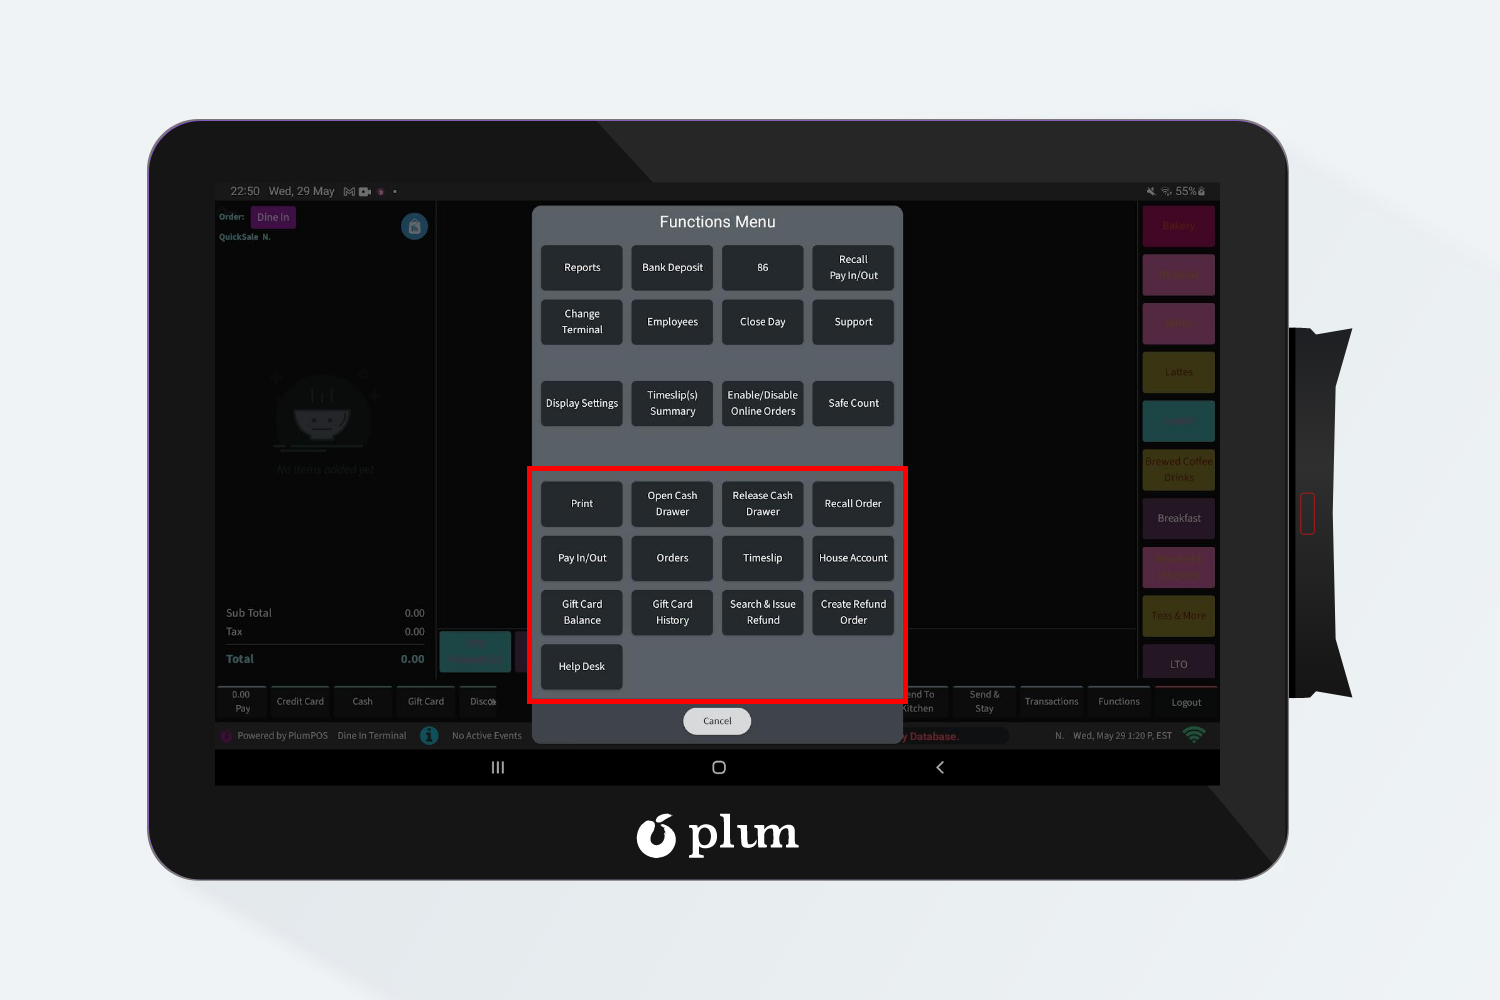
Below mentioned are the General (Crew) Functions which are accessible to all types of users
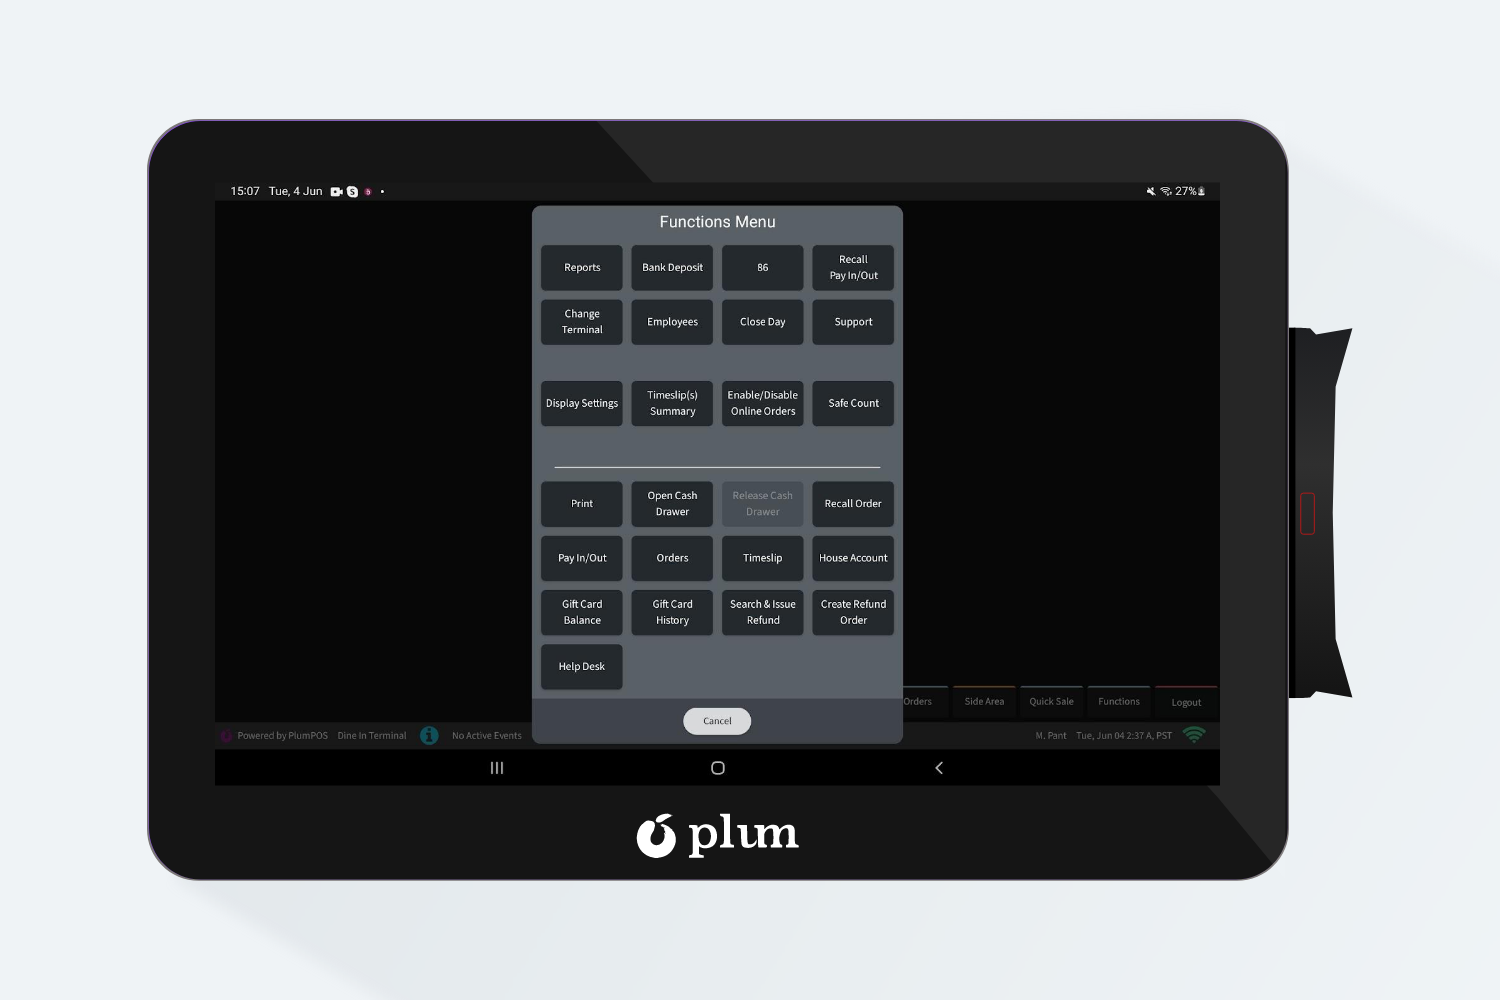
Types of General (Crew) Functions are:
- Open Cash Drawer
- Release Cash Drawer
- Recall Order
- Pay In/Out
- Orders
- Timeslip
- House Account
- Gift Card Balance
- Gift Card History
- Search & Issue Refund
- Create Refund Order
- Help Desk
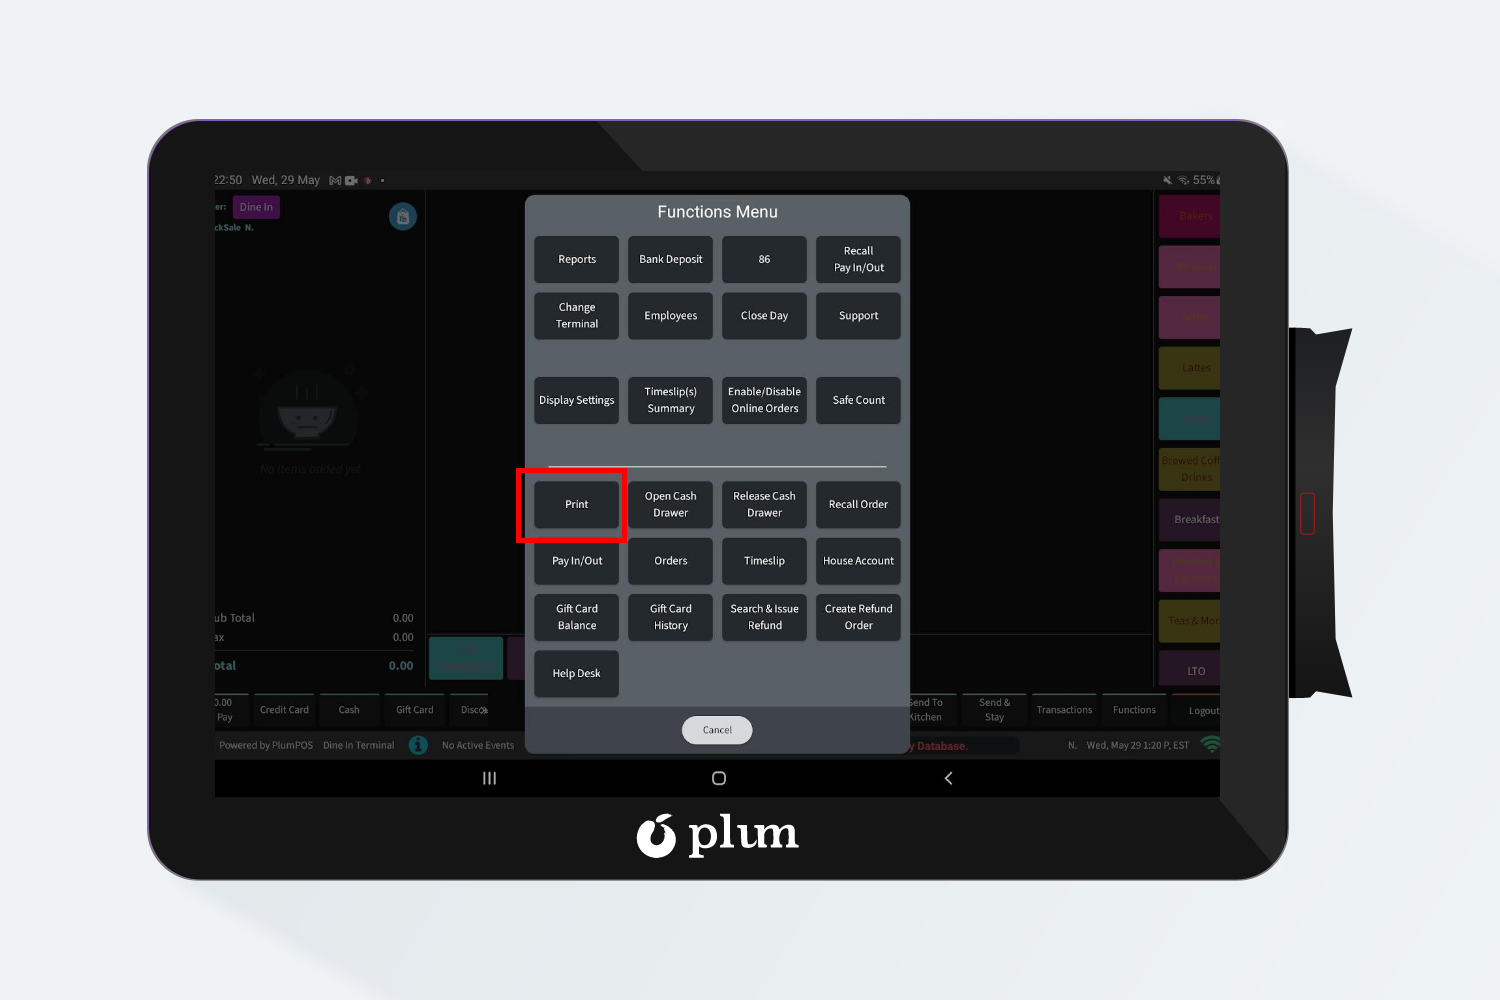
- Print: By using this button users can print the checks.
- Open Cash Drawer: Users can click on ‘Open Cash drawer’ [button] to open the Cash drawer.
- Assign Cash Drawer: If the user wants to assign the Cash Drawer, we have provided a flag called ‘Owner Required’ under the device screen. The user needs to enable this flag from the device screen.
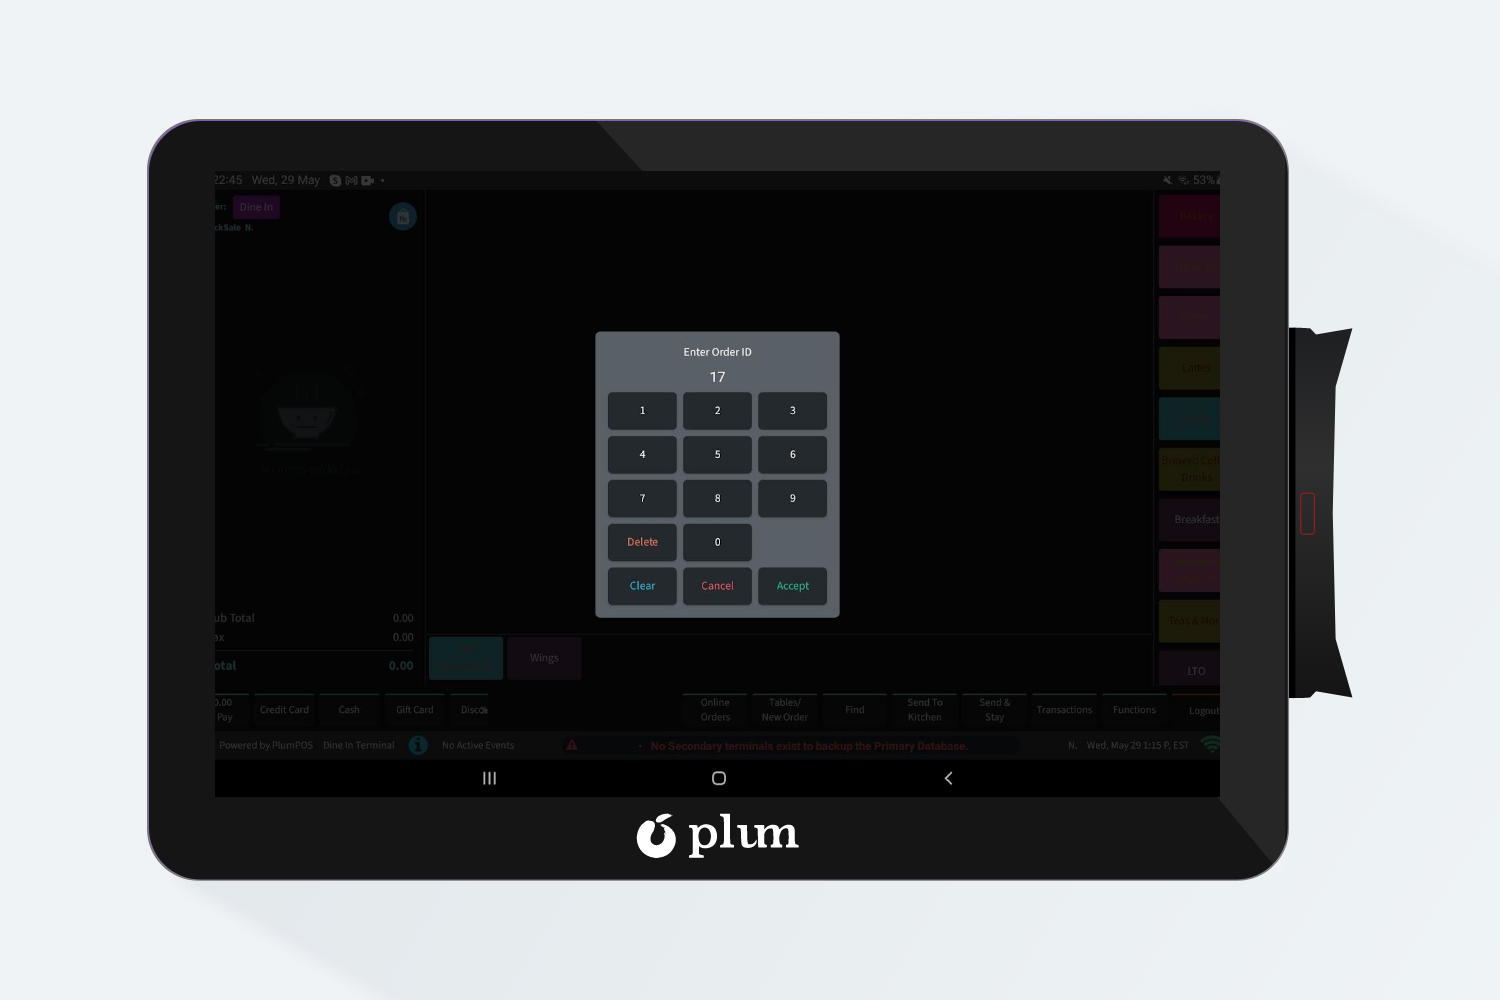
- Recall Orders: To recall orders, users are required to navigate into the crew functions and select the recall orders option. As soon as the user clicks on the recall orders option a pop will generate and the user needs to enter the order id that he/she wants to recall and hit on the accept button to get the order as shown in the screenshot below. Once the user enters the order id then the screen will get navigated to check.
- Pay In / Out: If a user has to create a takeout or enter some cash amount in the Cash drawer for some reason other than for order payment, to keep track of it we need to do pay in/out.
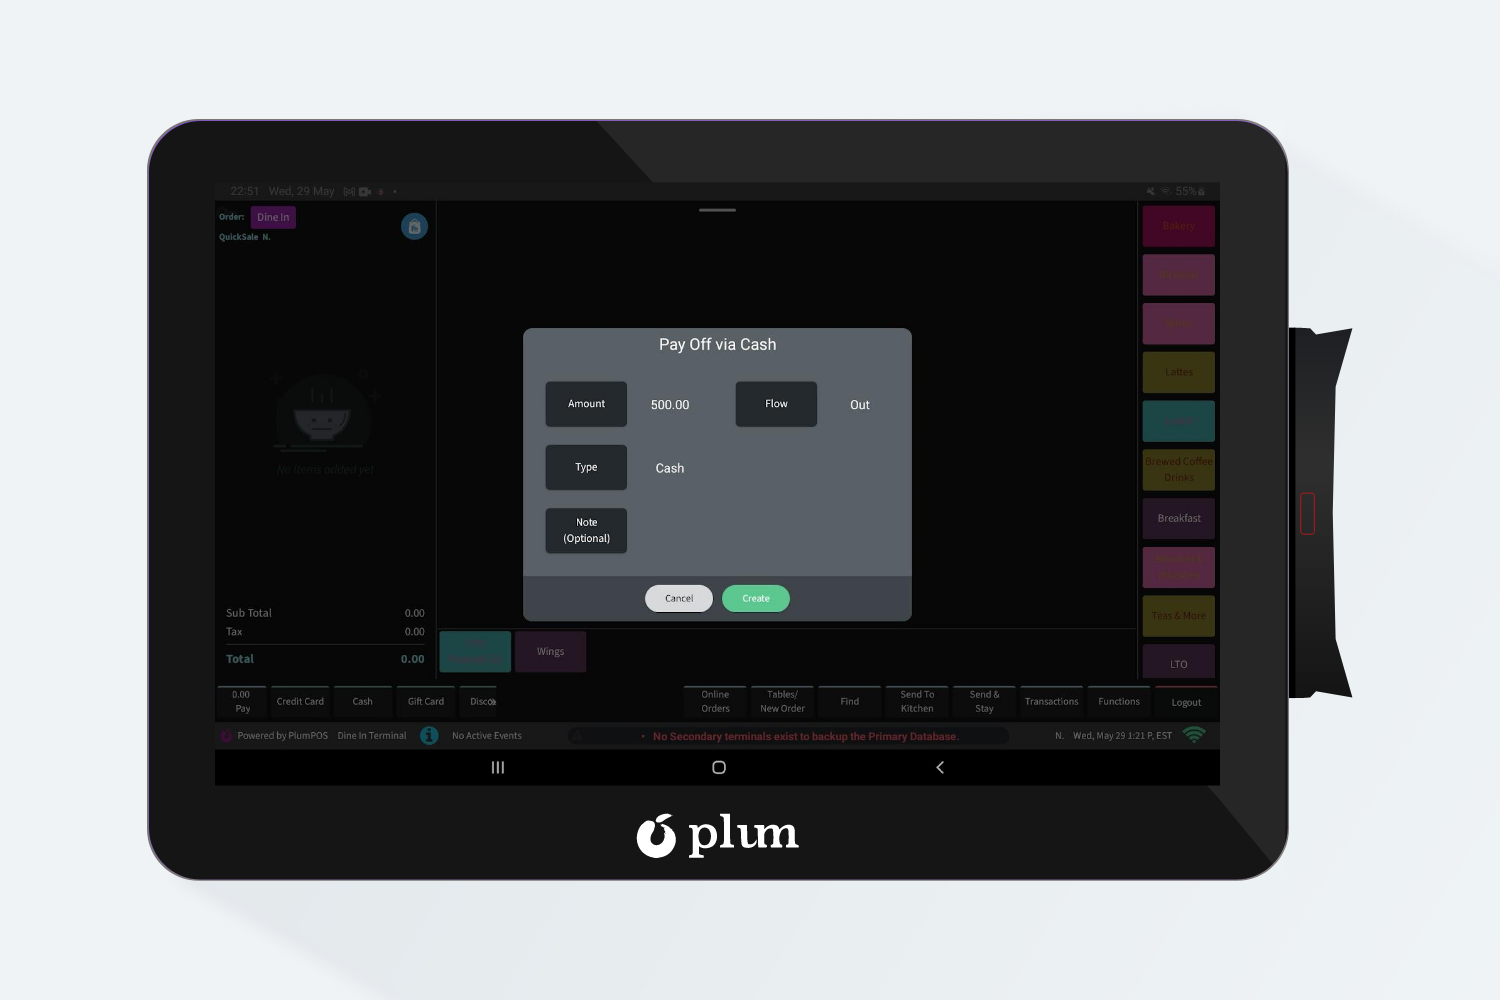
- Pay Out : If, Manager asks a crew member to buy some items from a local vendor like 100 cans of coke for $500. For that, he needs to take out that cash from the drawer to pay, so for that he needs to create Pay Out of $500.

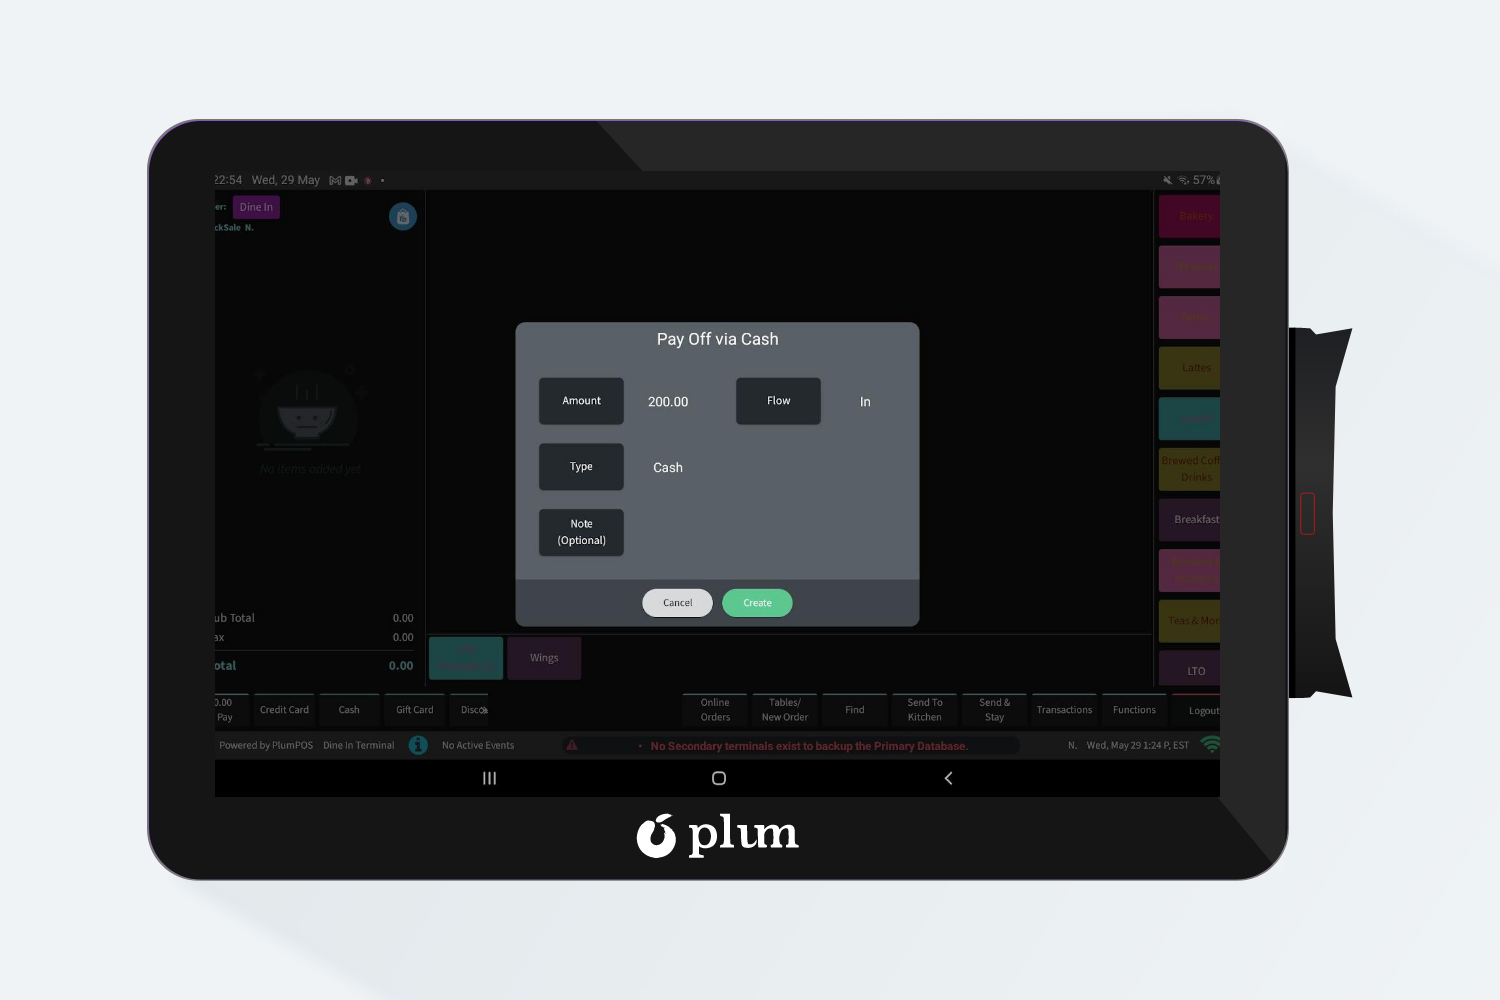
- Pay In: Let’s say the crew was only able to buy items for $300 and he needs to enter in the left $200, so to track that he needs to create the Pay In of $200.

Steps to create a Pay In/Out on IPA:
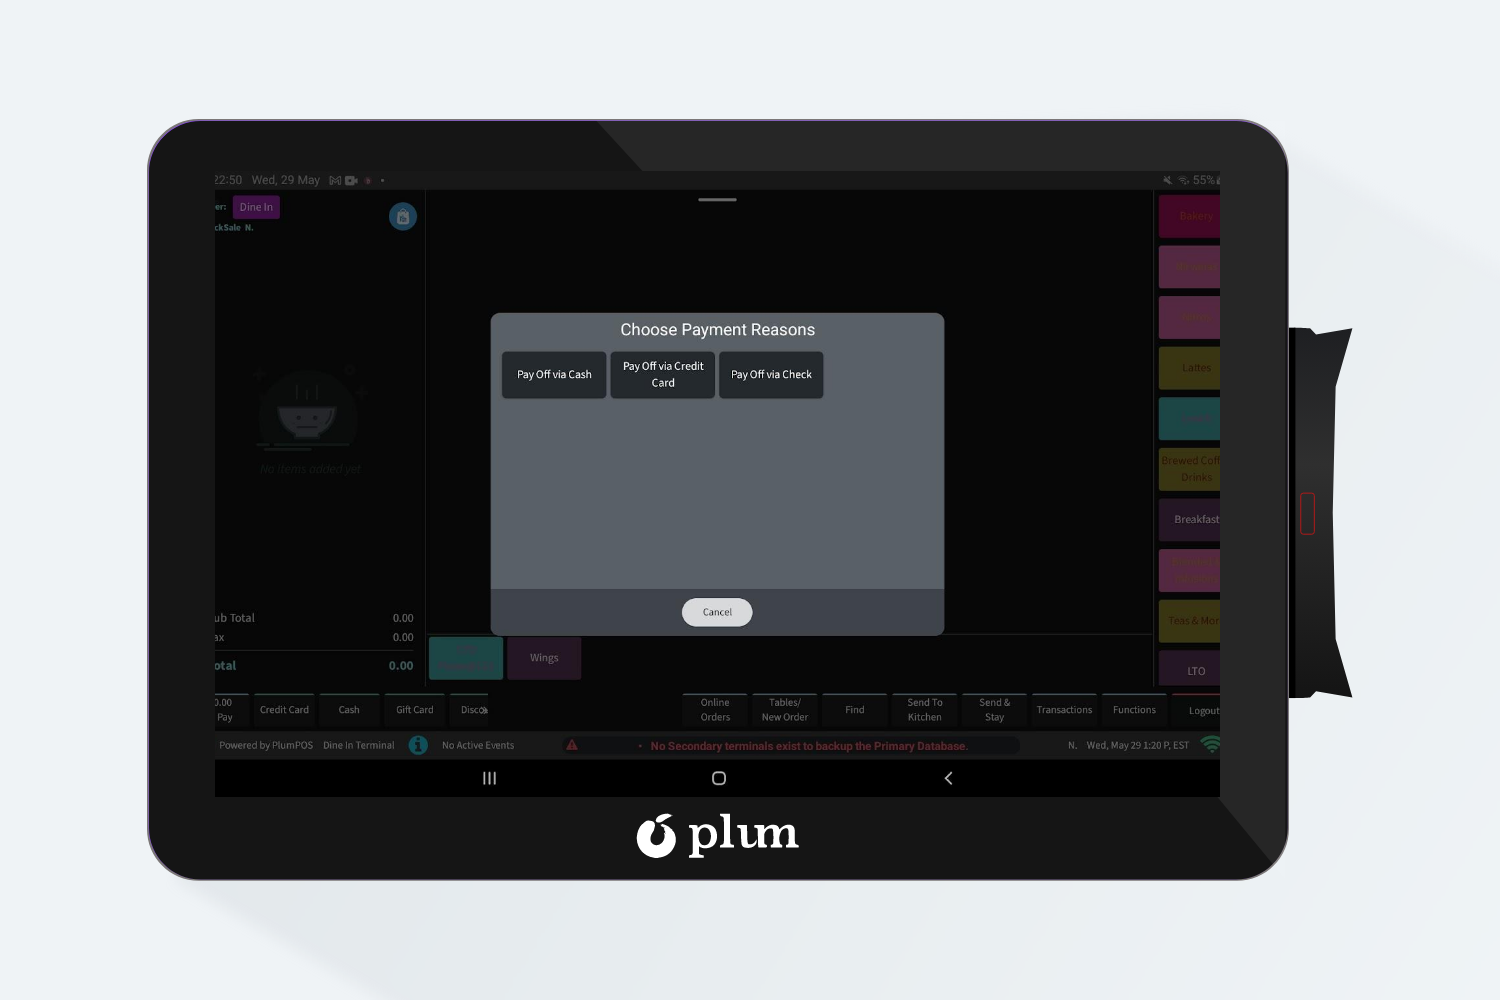
- Click on the Functions [button] and then on Pay In/Out.
- All the Payment reasons added in Hubworks will be displayed.
- User can select the appropriate reason
- Enter the amount, Type as Cash/Credit Card and Flow as In or Out.
- Click on Create
- The Pay in/Out will be created
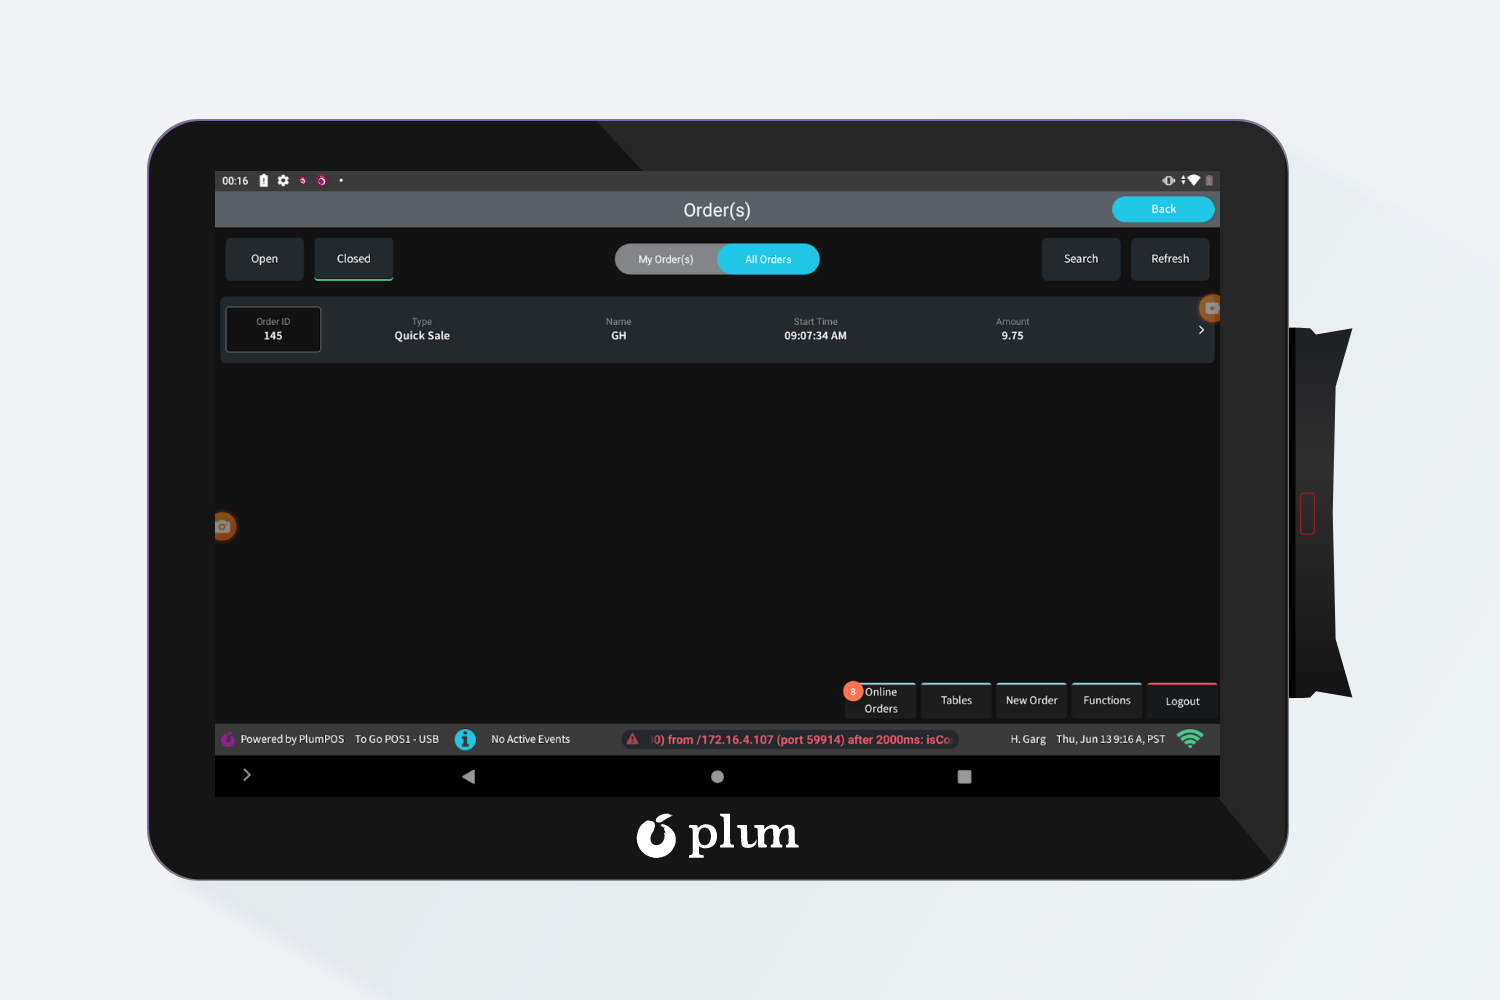
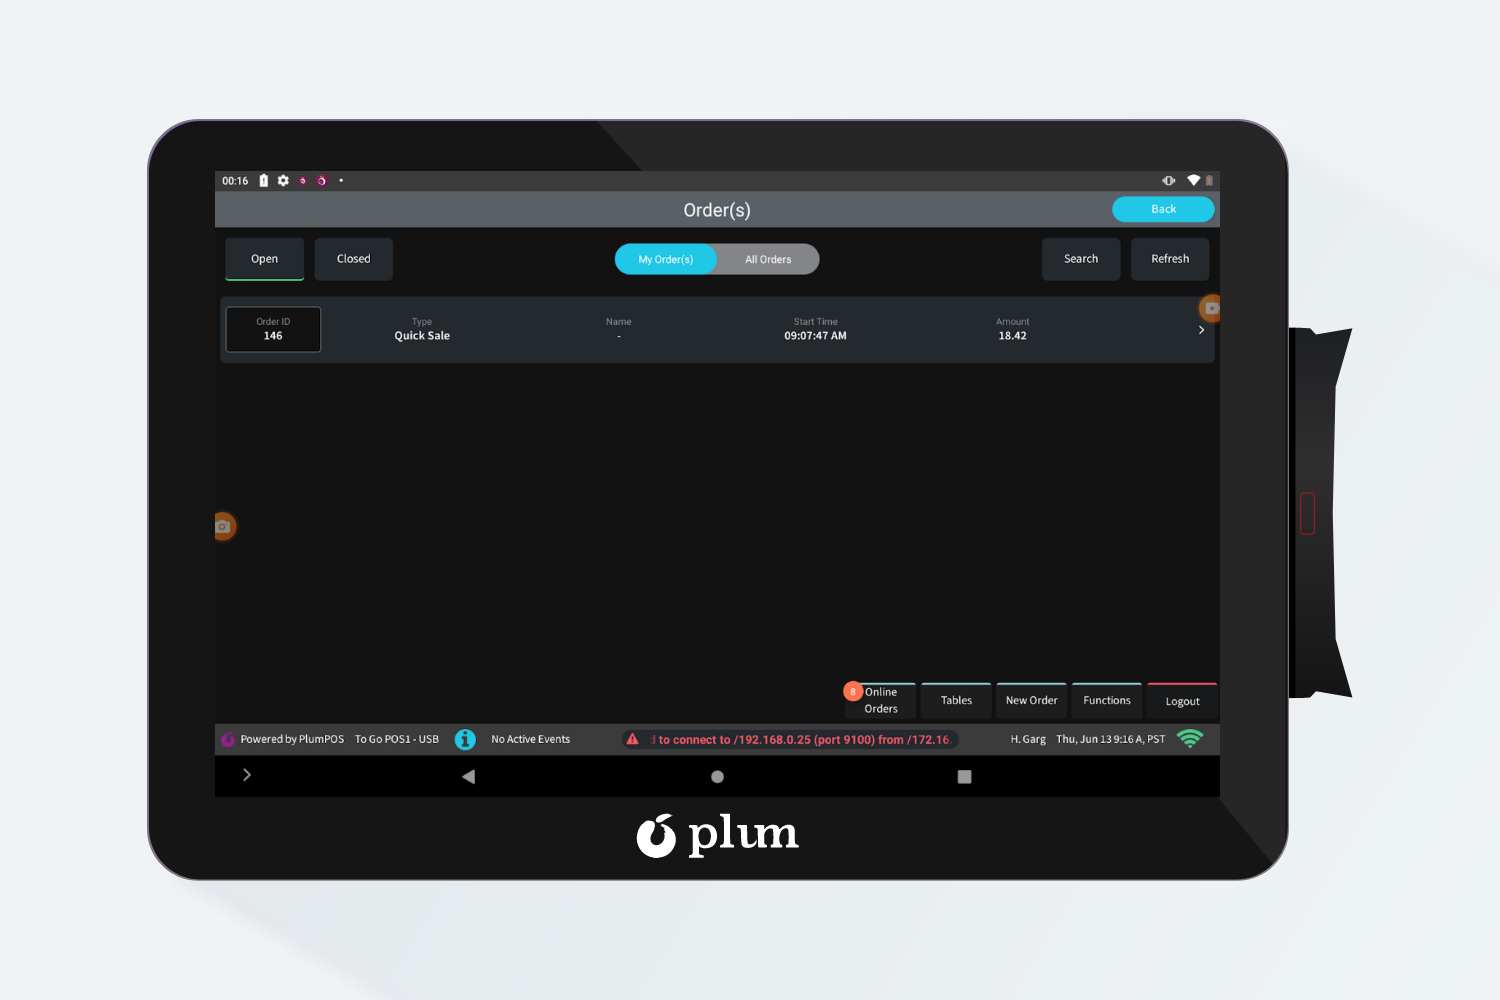
- Orders: Users can view all open and closed orders by clicking the Orders button, and by selecting the All-Orders button, they can view open and closed orders from different timeslip(s).
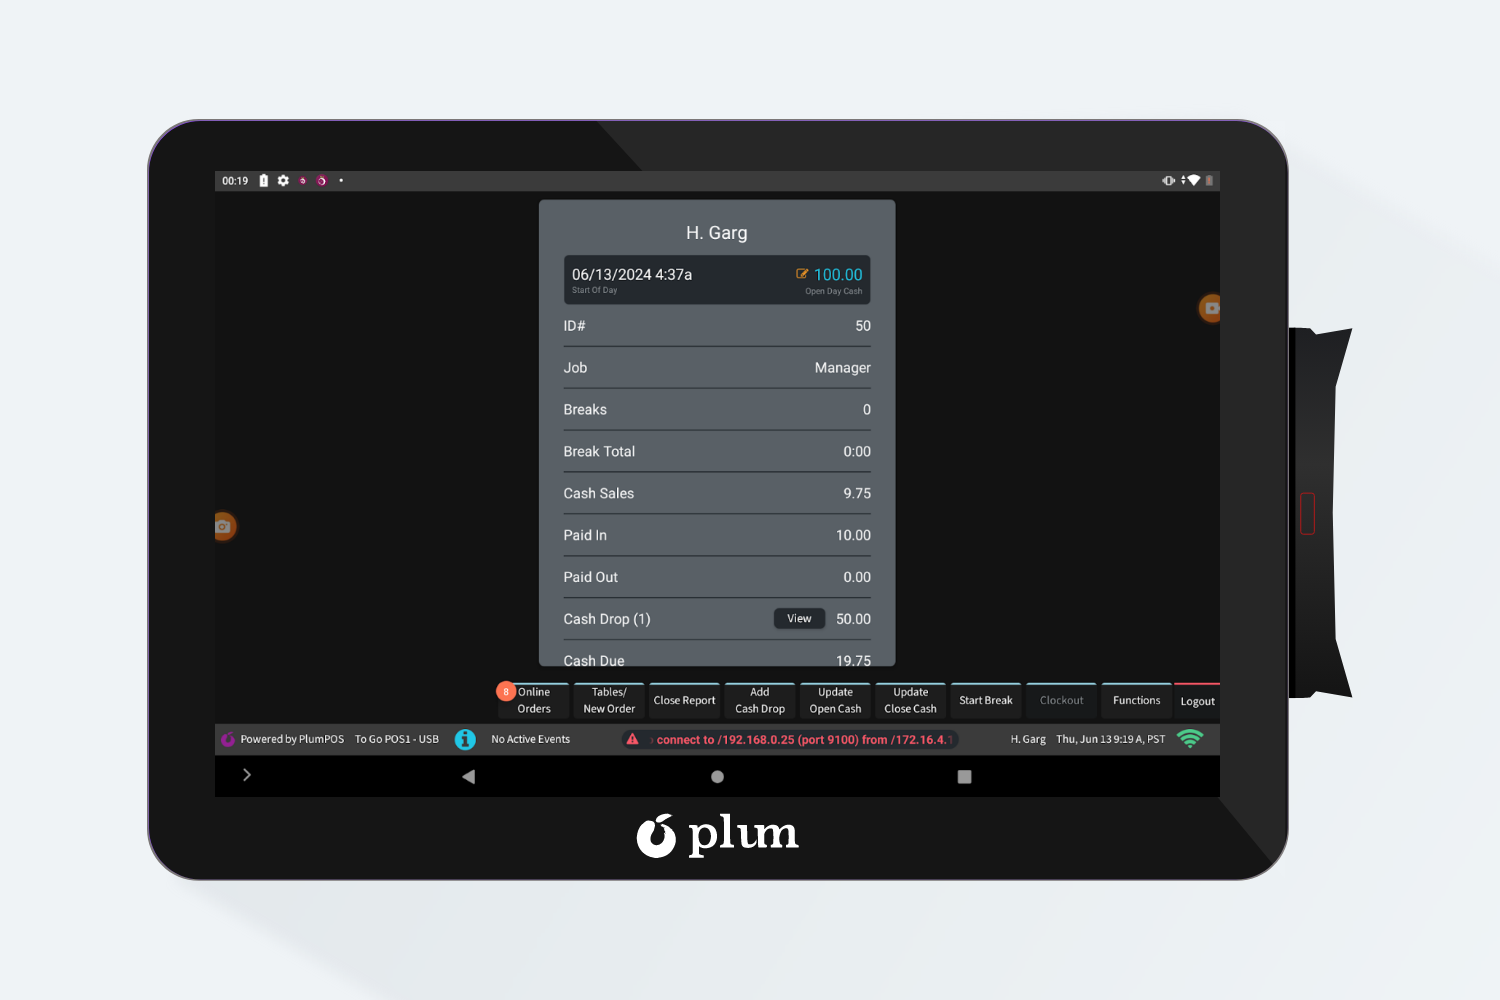
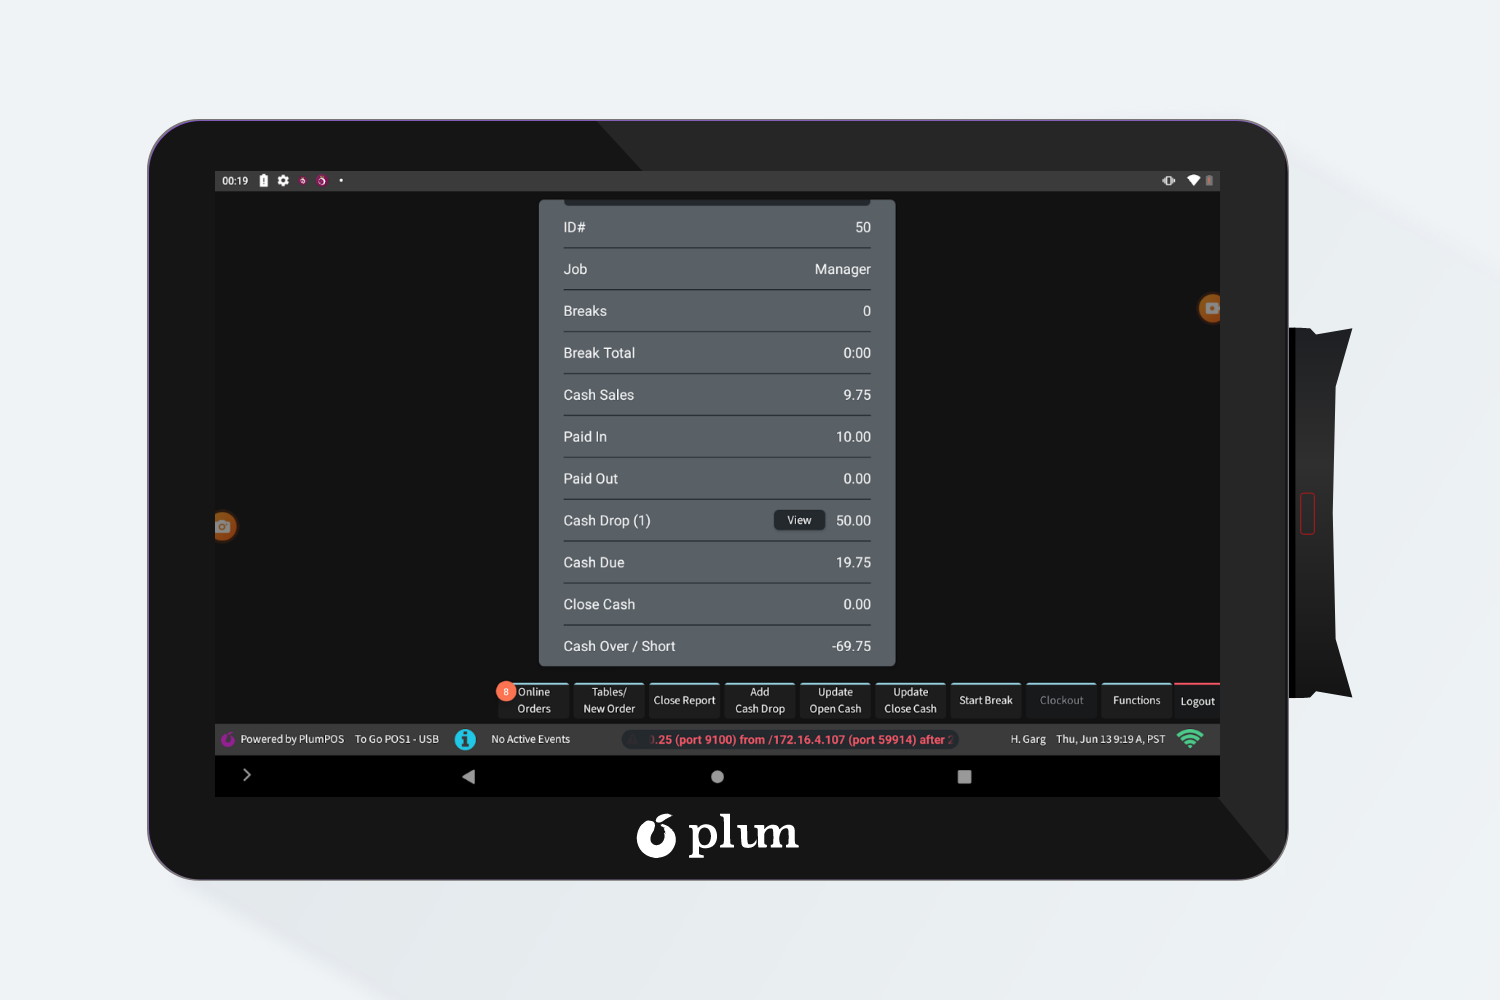
- Timeslip(s): Clicking this module users can see their timeslip details like Open Cash, Job Code, Cash Sales, Cash Due, Close Cash, Cash Drop etc. Users can also clock out from this screen after closing their Open orders and transfer them to another timeslip and enter their close cash.
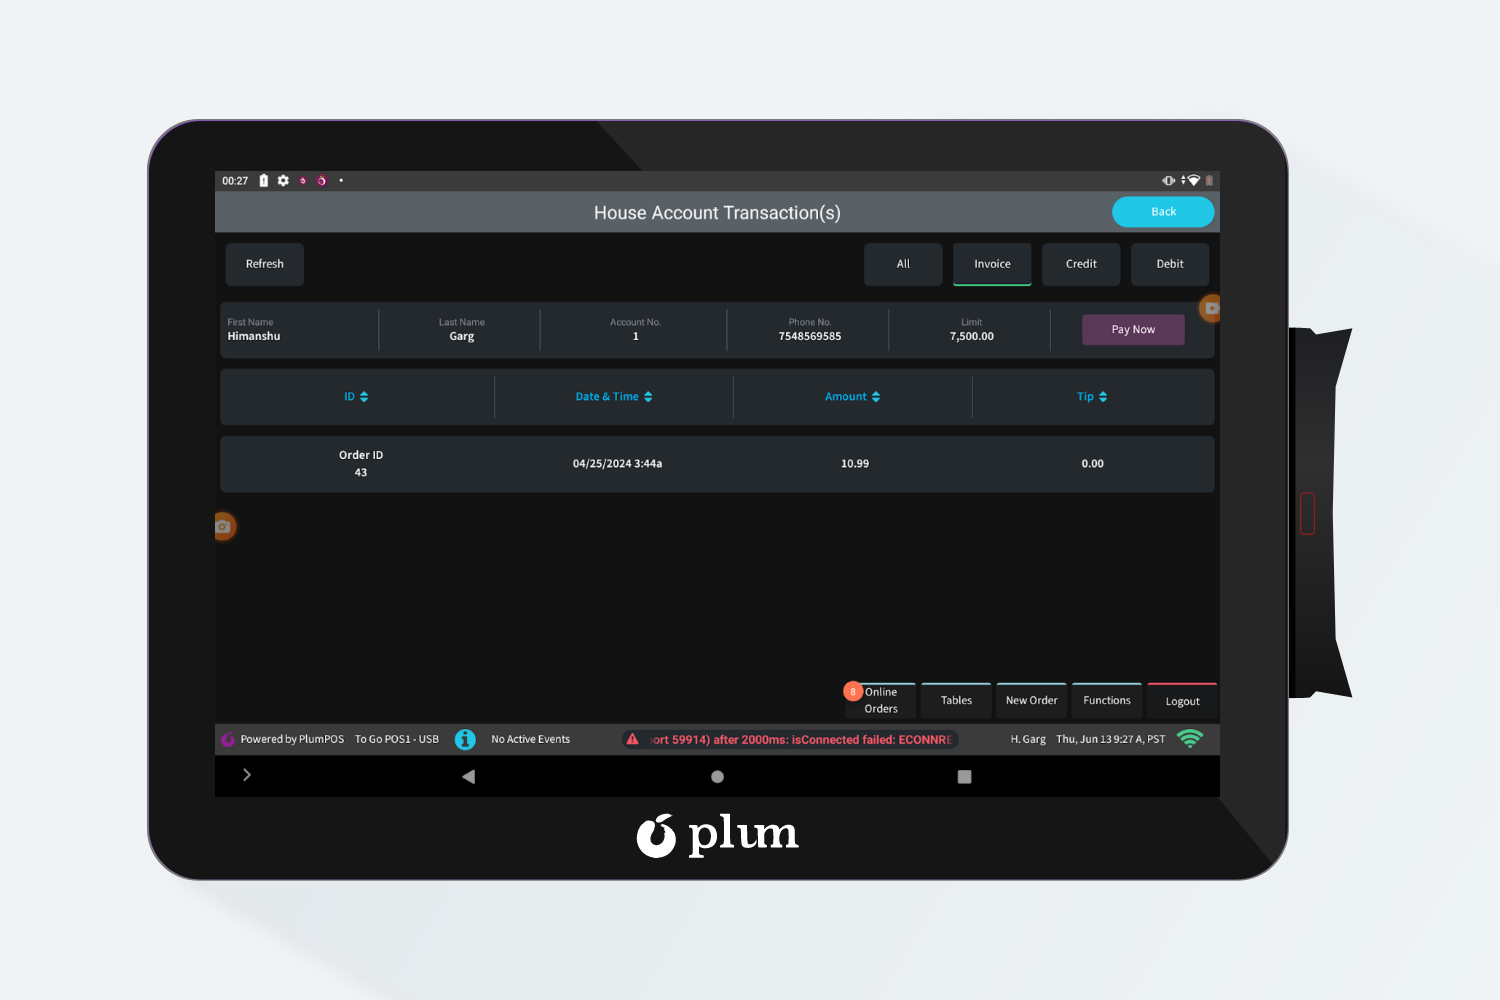
- House Account: In this Module user can see all the House account details with transaction details and can Pay off their House Account Balance.

- Gift Card Balance: In this module users can see the Gift Card Balance by entering the Gift Card number and PAN number.
- If any customer wants to view the balance of his Gift Card, then it can be done by following steps:
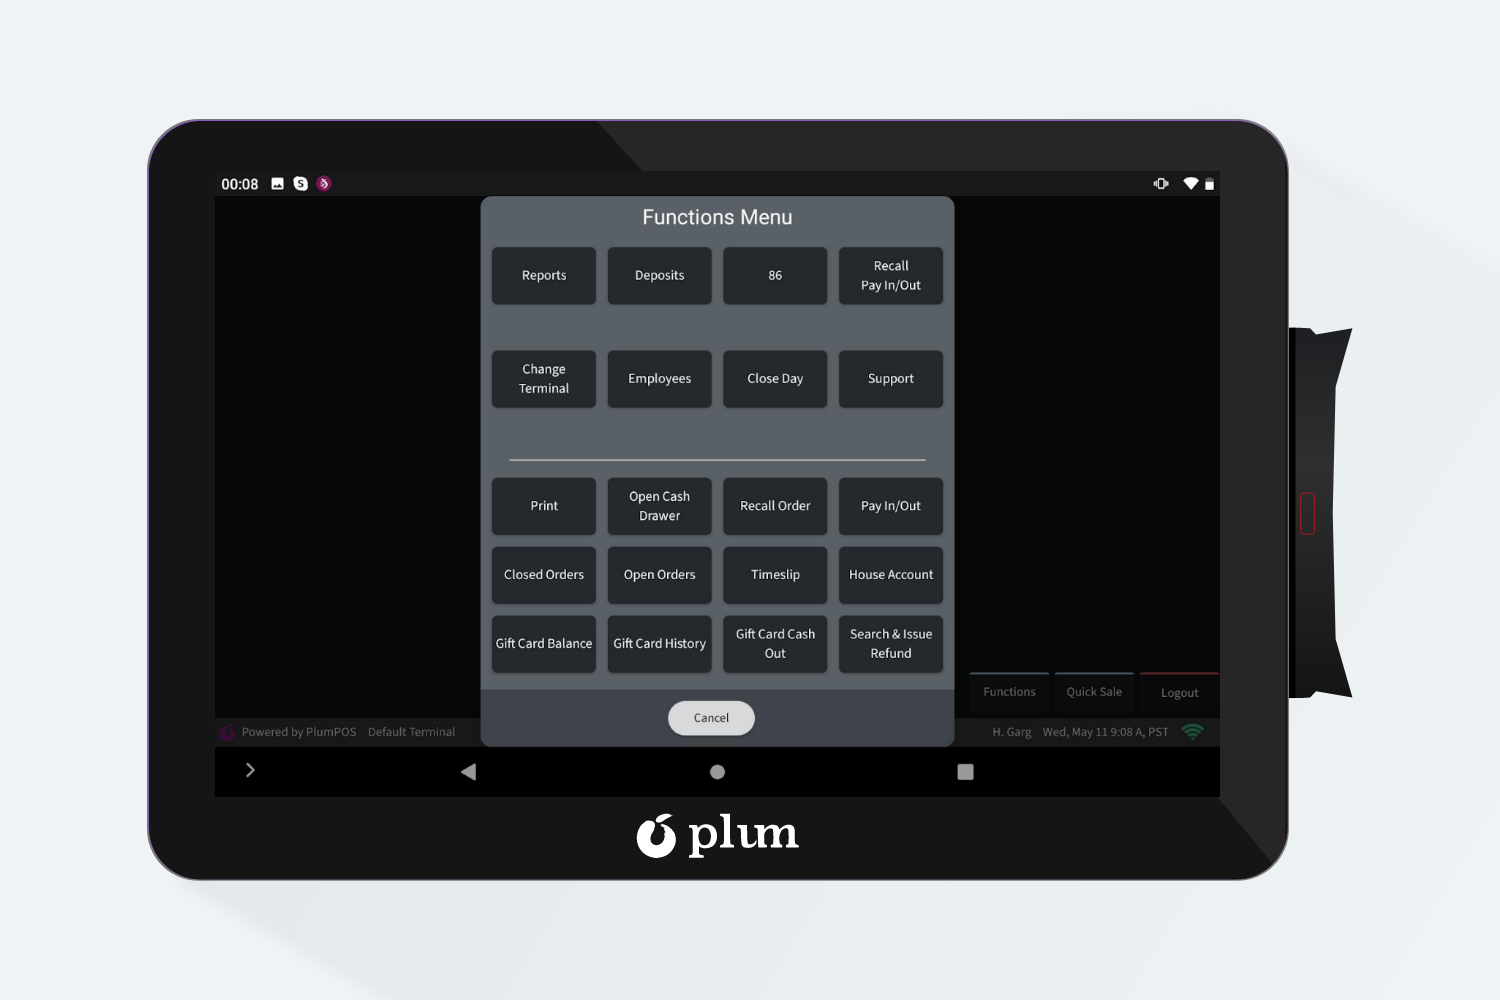
- Step 1: Click on “Gift Card Balance” in Functions.
- Step 2: Swipe the Card on Swipe Reader or enter the PAN and PIN of Gift Card
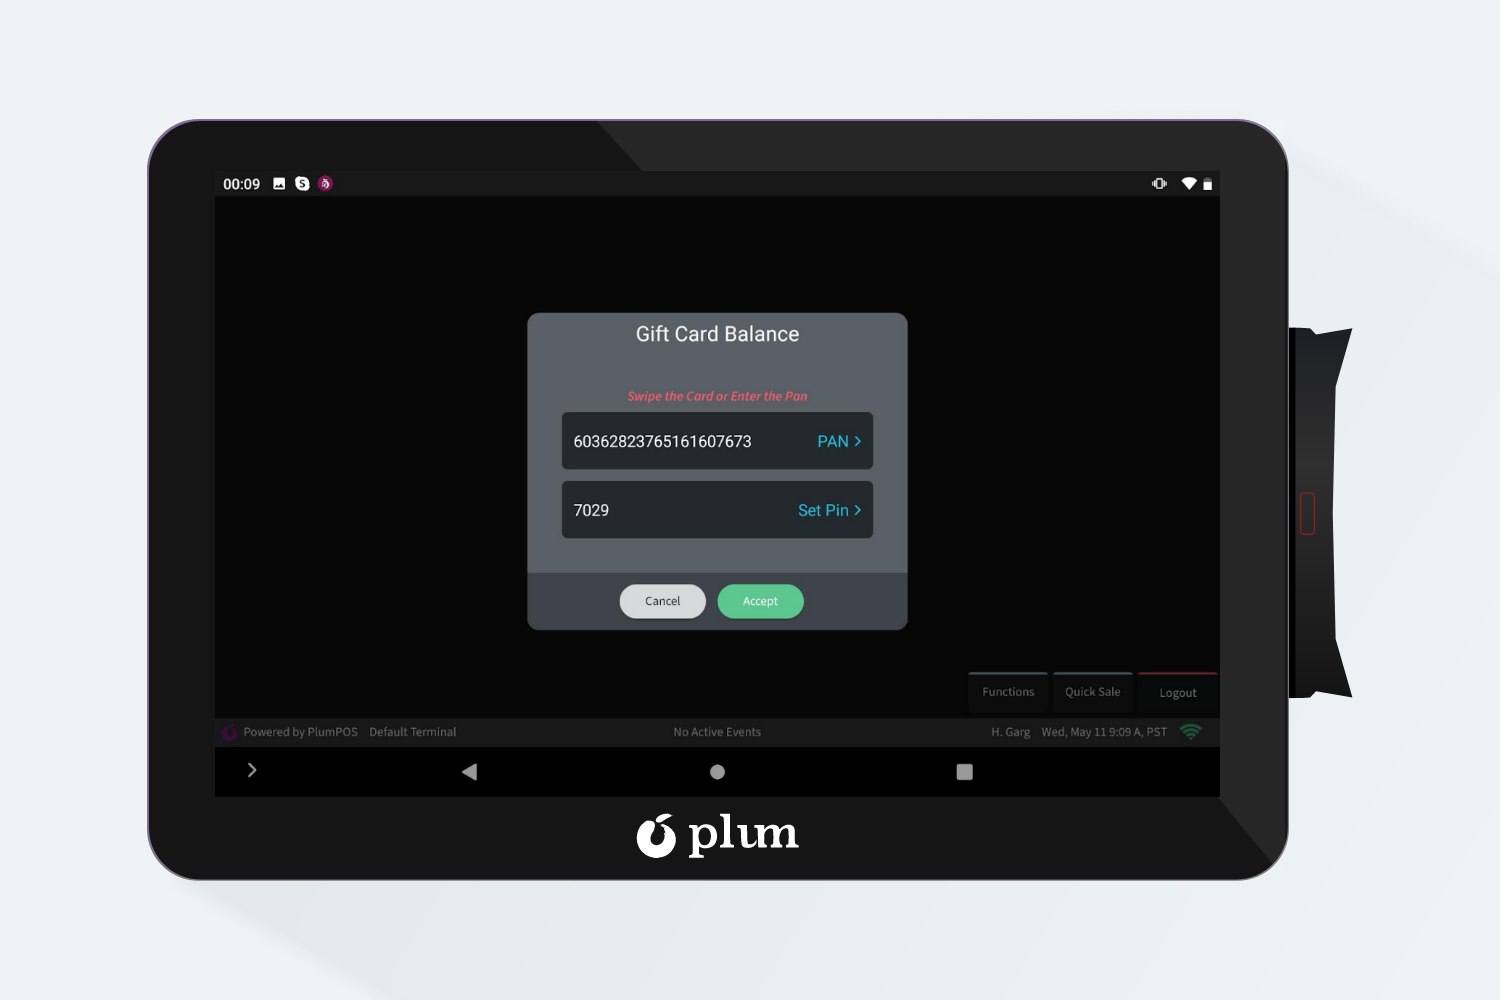
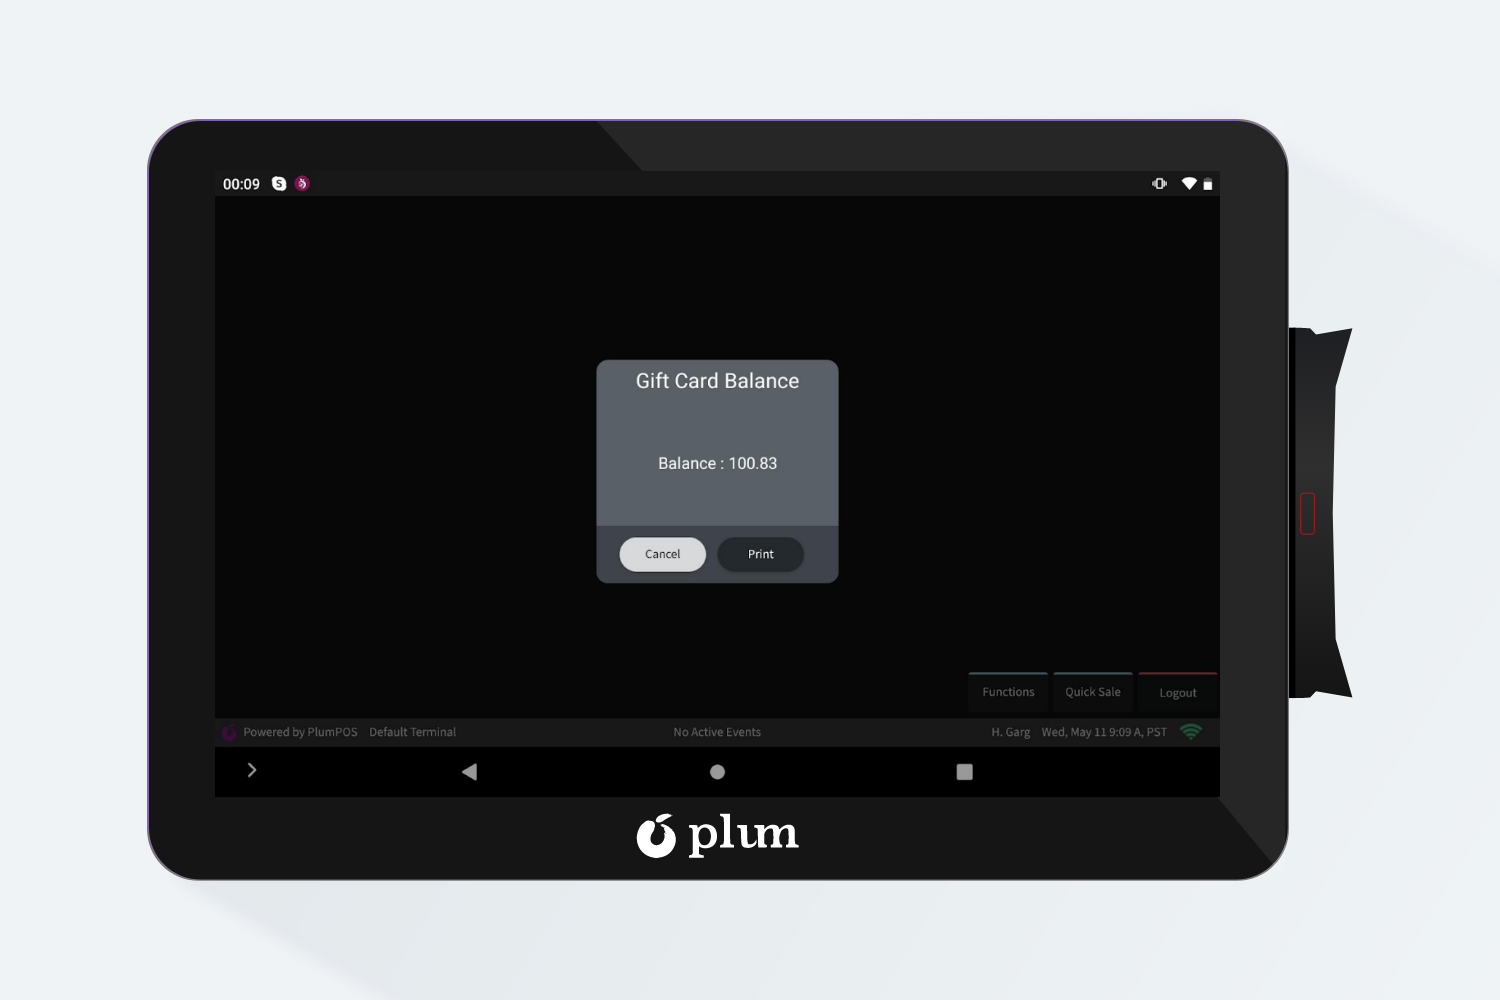
- Click on Accept
- The Balance will be displayed.
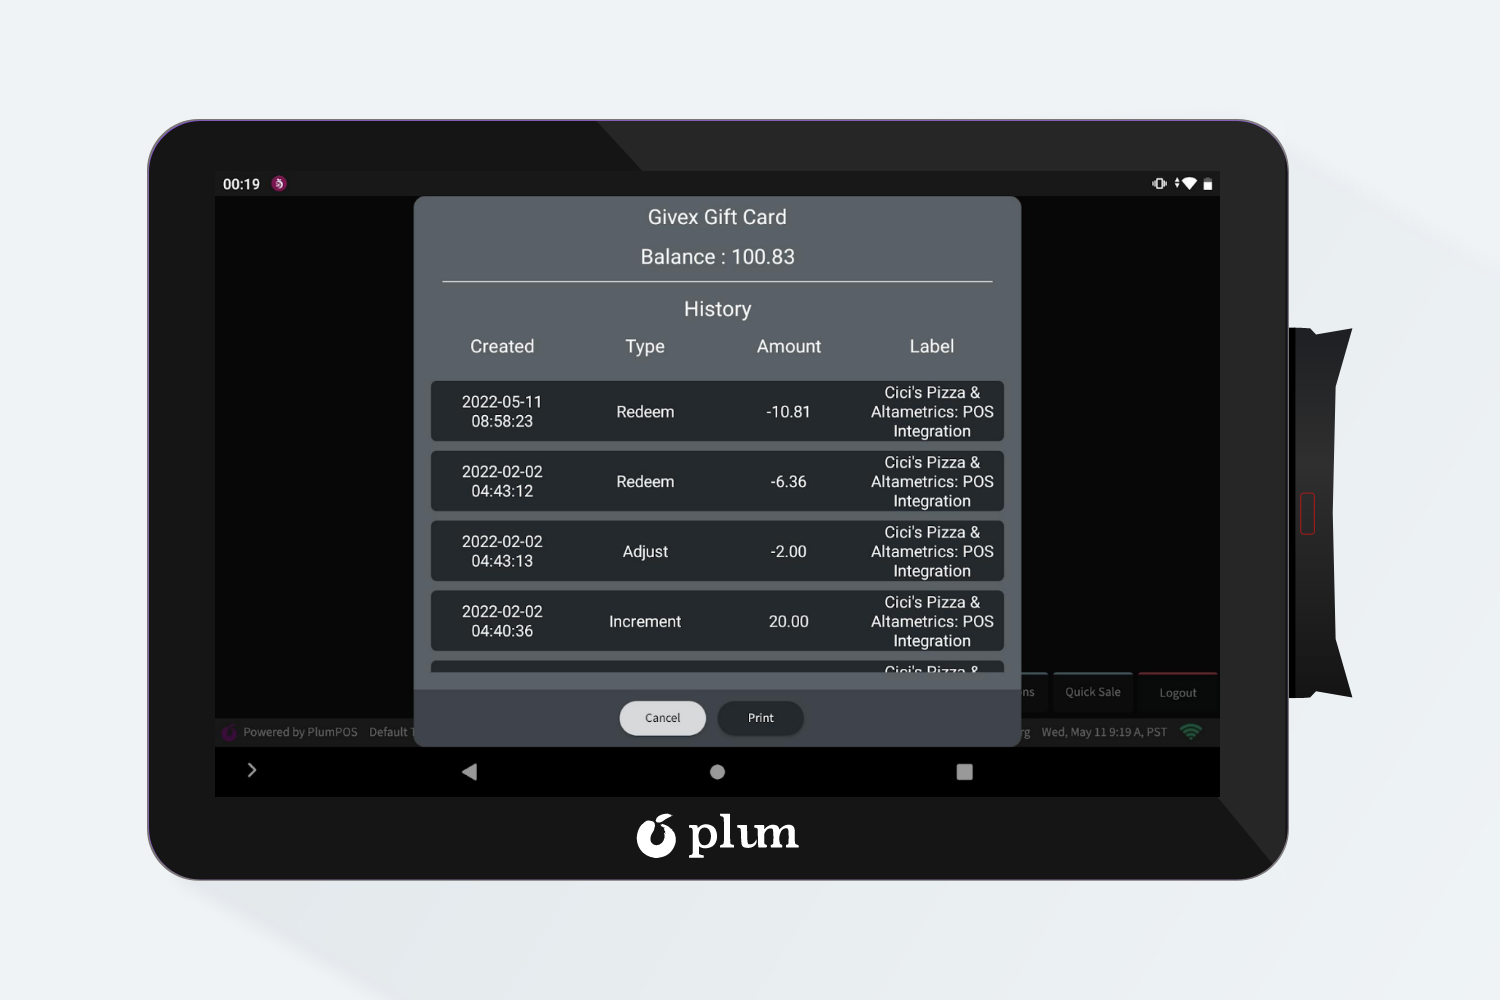
- Gift Card History: In this module users can see the Gift Card Transactions History by entering the Gift Card number and PAN number.
If any customer wants to view the history of all the previous transactions of his Gift Card then it can be done by following steps :
- Click on “Gift Card History” in Functions.

- Swipe the Card on the Swipe Reader or enter the PAN and PIN of the Gift Card.
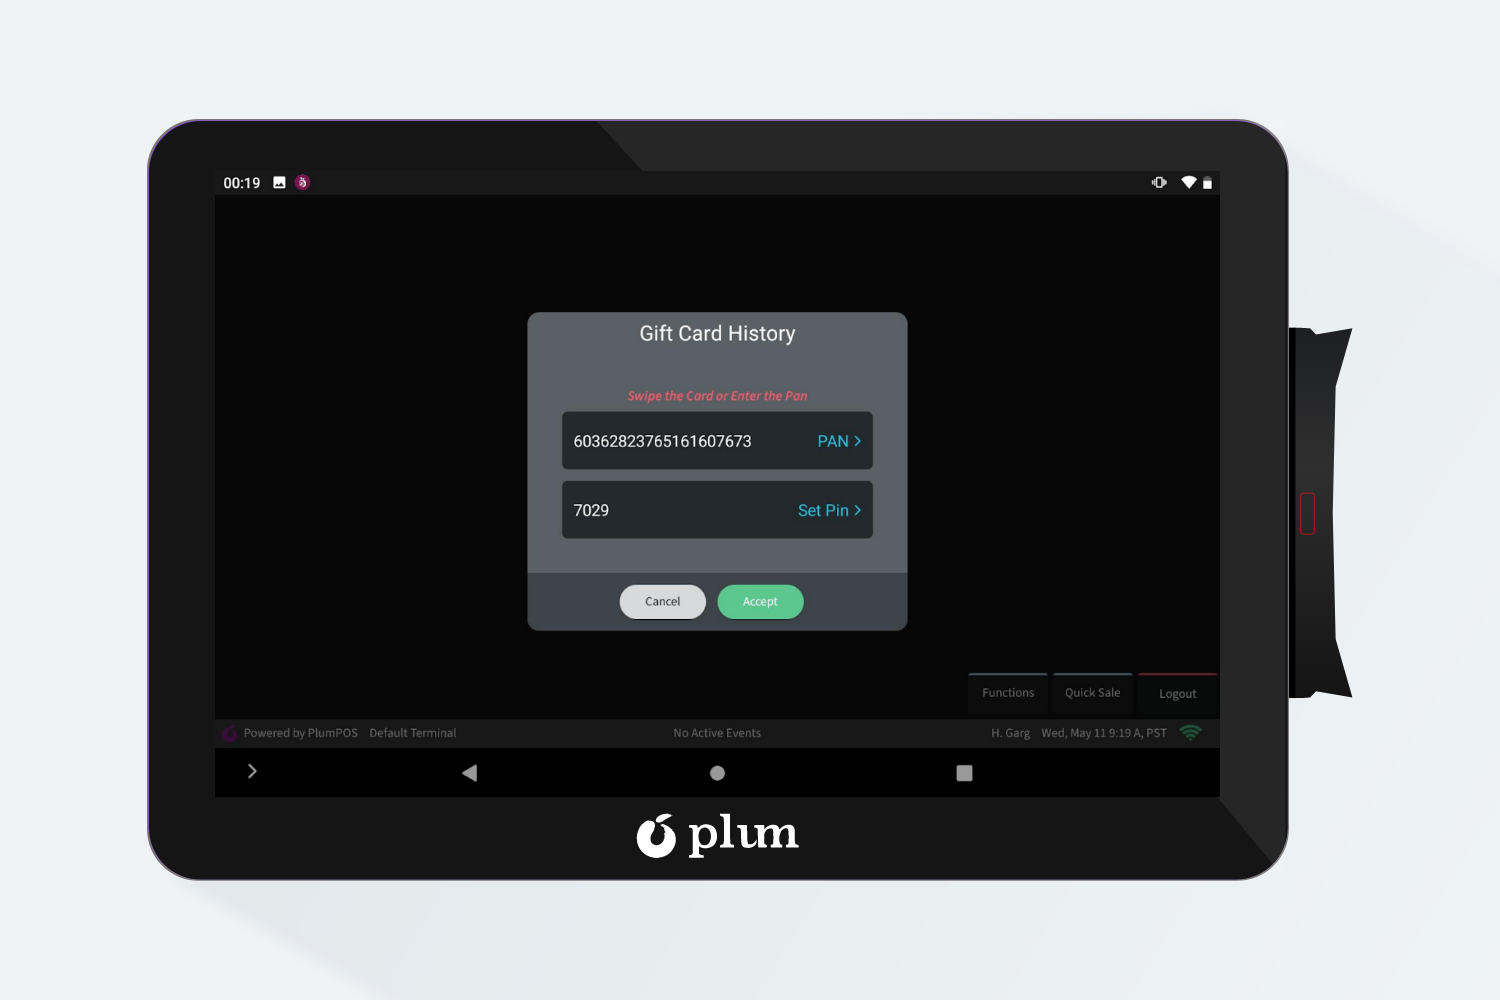
Step 3: Click on Accept.
Gift Card History will be displayed.
- Search and Refund
In this function users can search the Order ID and Issue refund for that order ID.
- Users can refund the items from the closed orders of a day by going to the Functions Menu > Select & Issue Refund[button] or by going into that closed order and clicking on Order Functions > Initiate Refund[button].
- If the user goes through Select & Issue Refund, then needs to search the closed order by Id or order name.
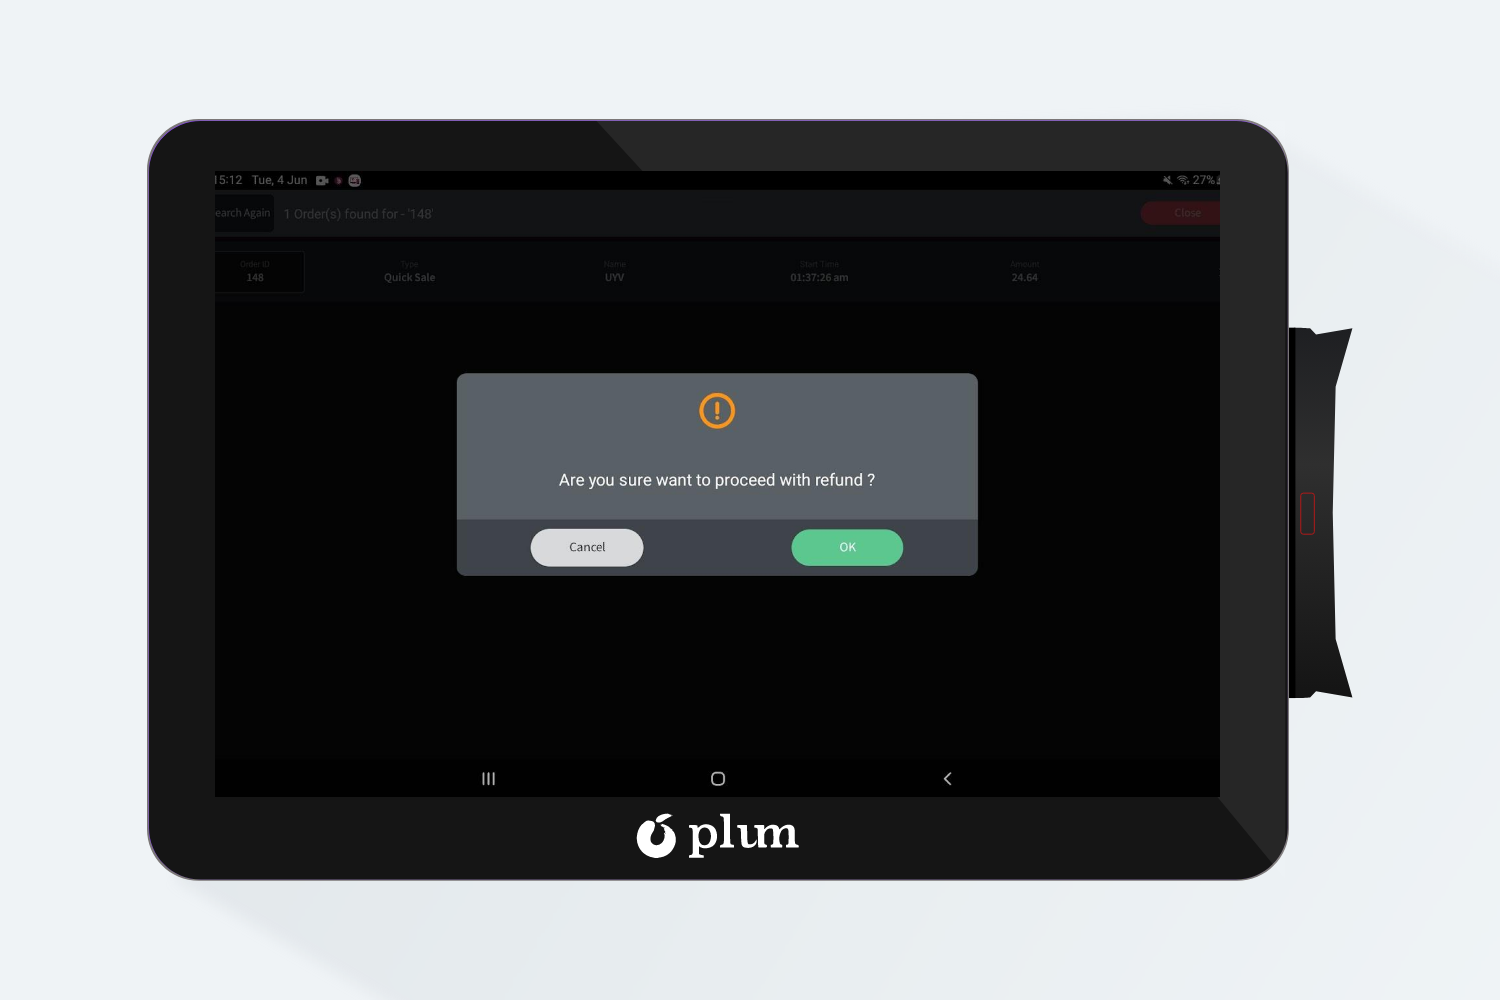
- If the user goes through Initiate Refund, then it will directly navigate to the refund screen confirming a pop up.
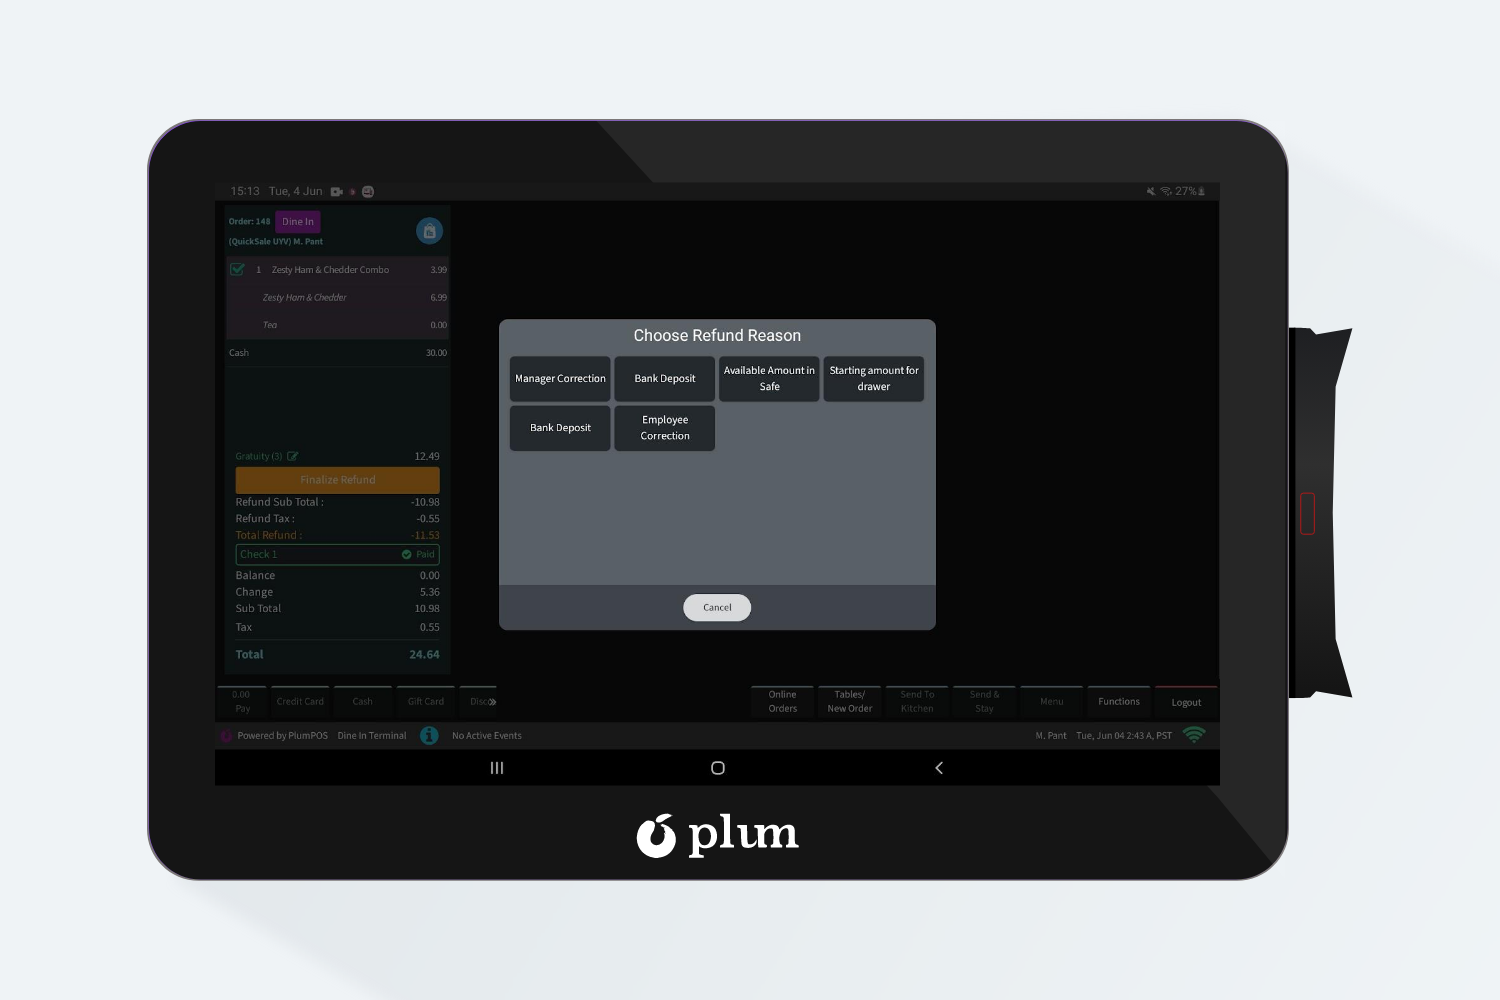
- On the Refund screen, the user needs to select items to refund and click on Finalize Refund[button].
- After Finalize Refund, the user needs to select the adjustment reason if any and then it would navigate to the refund items screen.
- Then the user can pay out the refund amount via cash and credit card.


- Create Refund Order
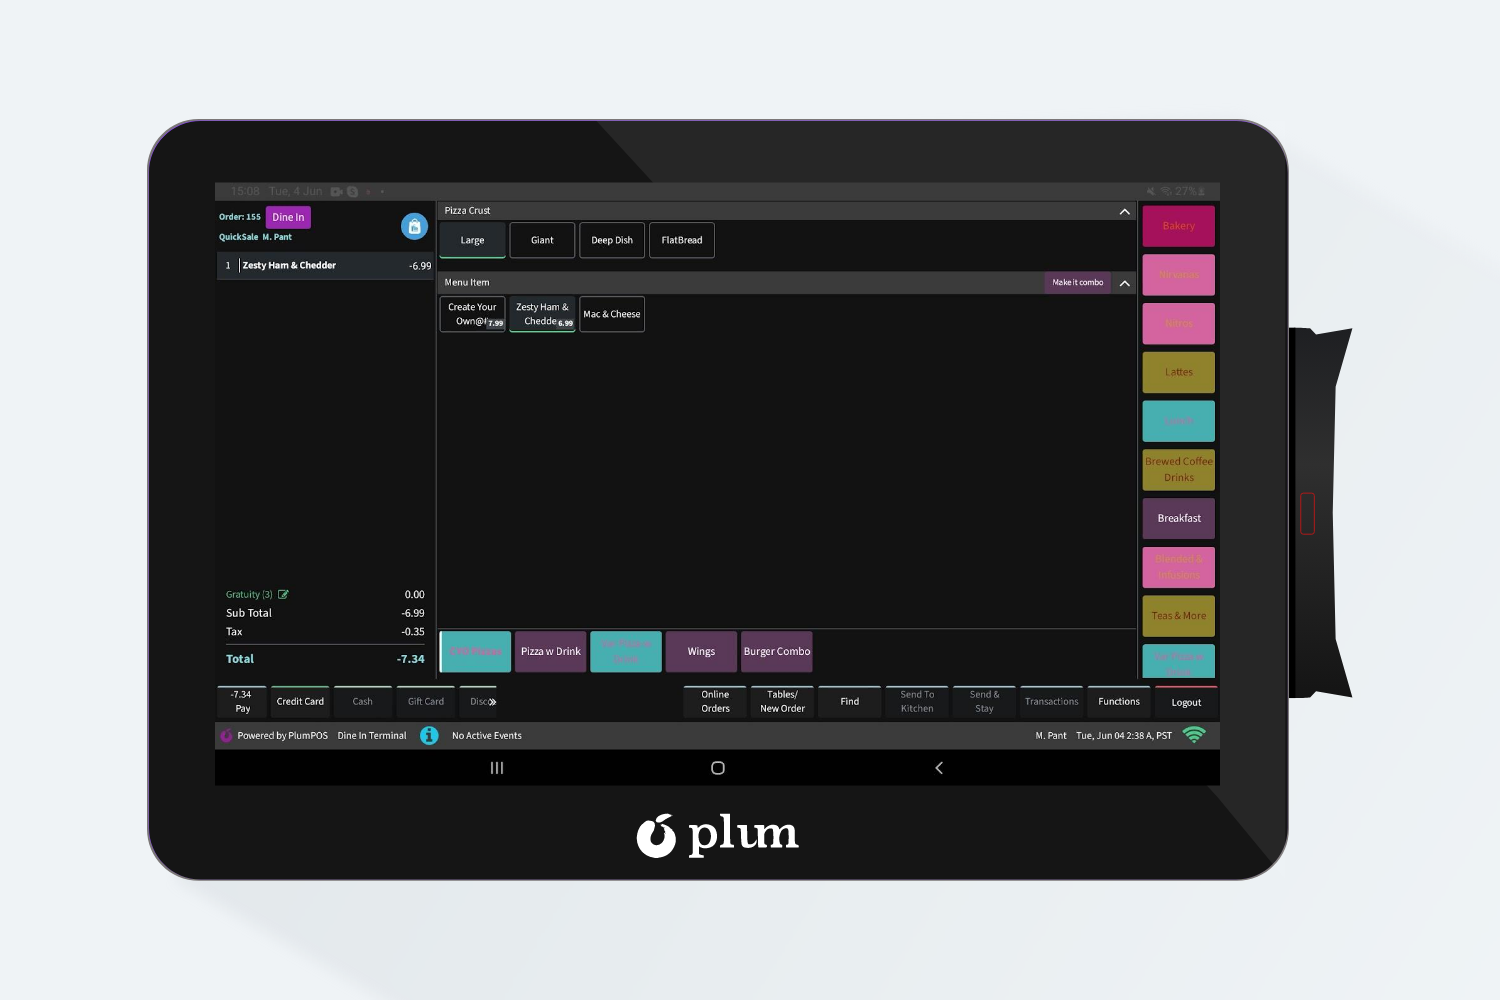
In this function users can create new refund orders with negative Items Amount, this is useful in cases where servers do not remember the exact order ID.
- Users can create a new refund order just by clicking on Create Refund Order[button] present under the Functions Menu.
2. After clicking it, the user will see a fraud alert pop up, they can click on the continue button to move forwards needs to select a refund reason if any and get the manager authorization.

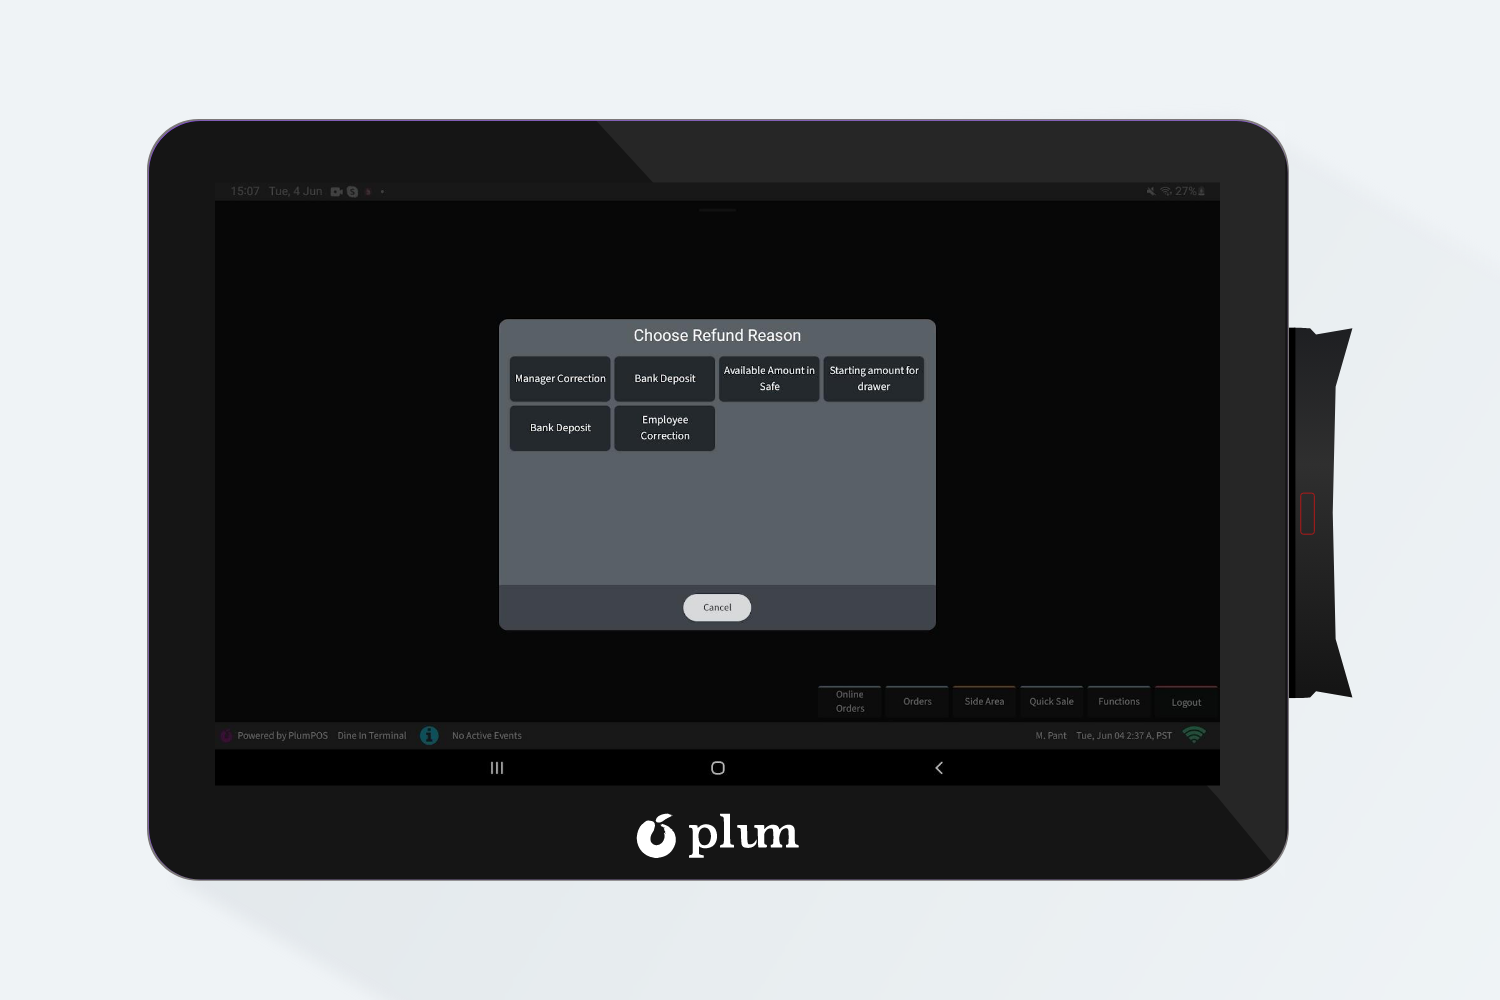
3. Then users can select & add the items on a check to refund via cash or credit card as shown below.
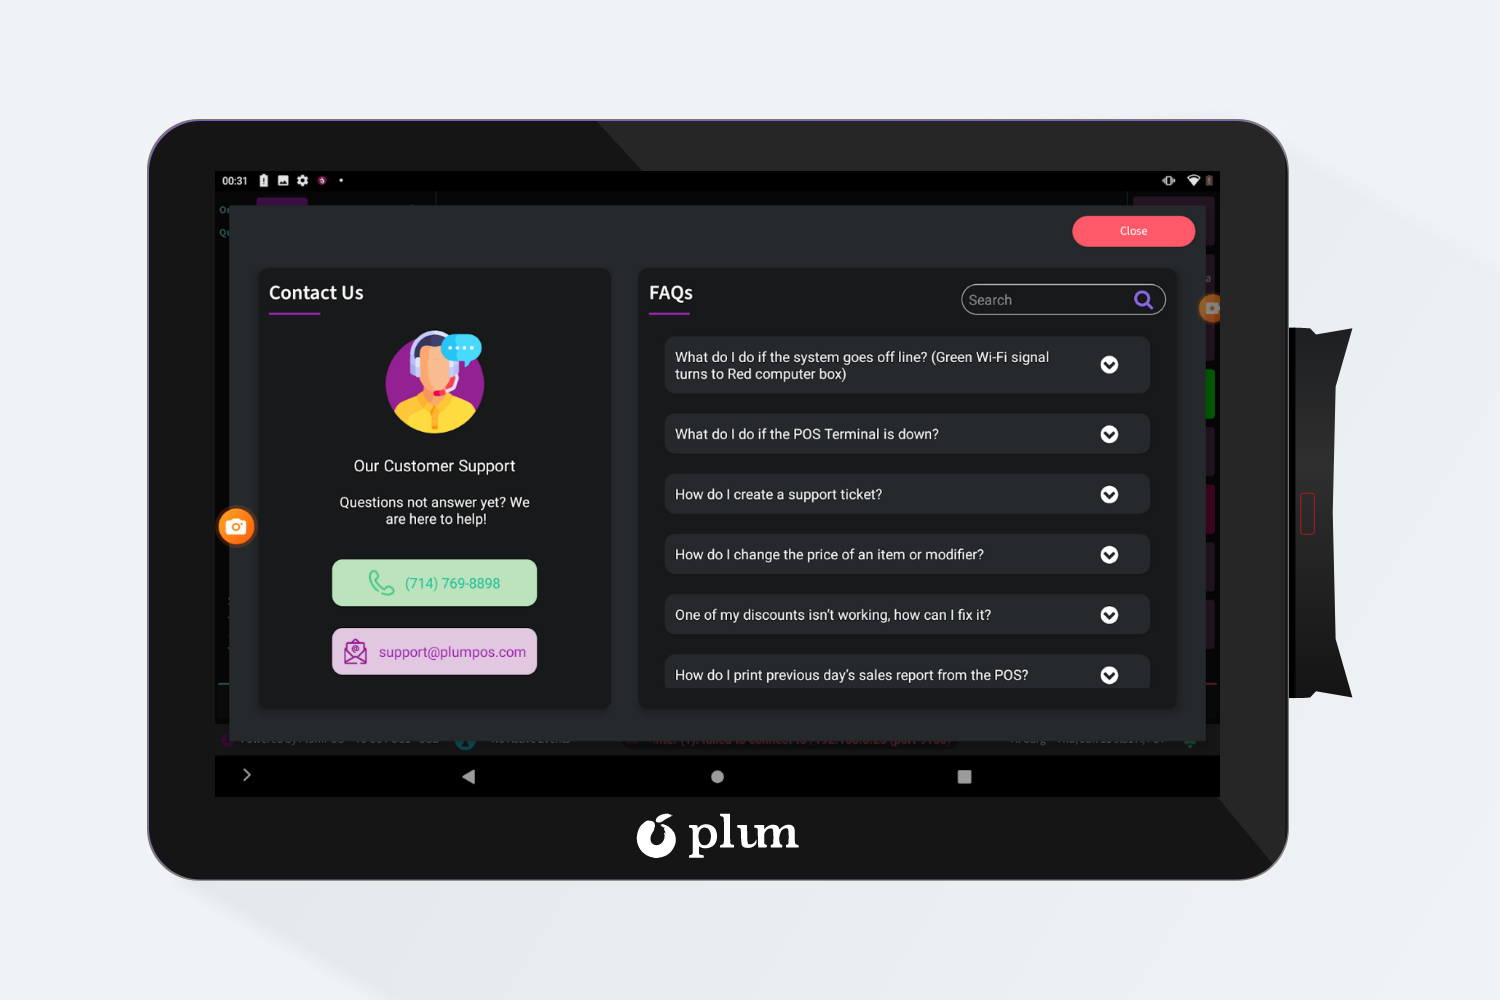
- Help Desk
From these functions users can check their doubts with the added FAQs in this section, if not satisfied they can raise their query on the Support call number or can mail to Support Email ID provided.
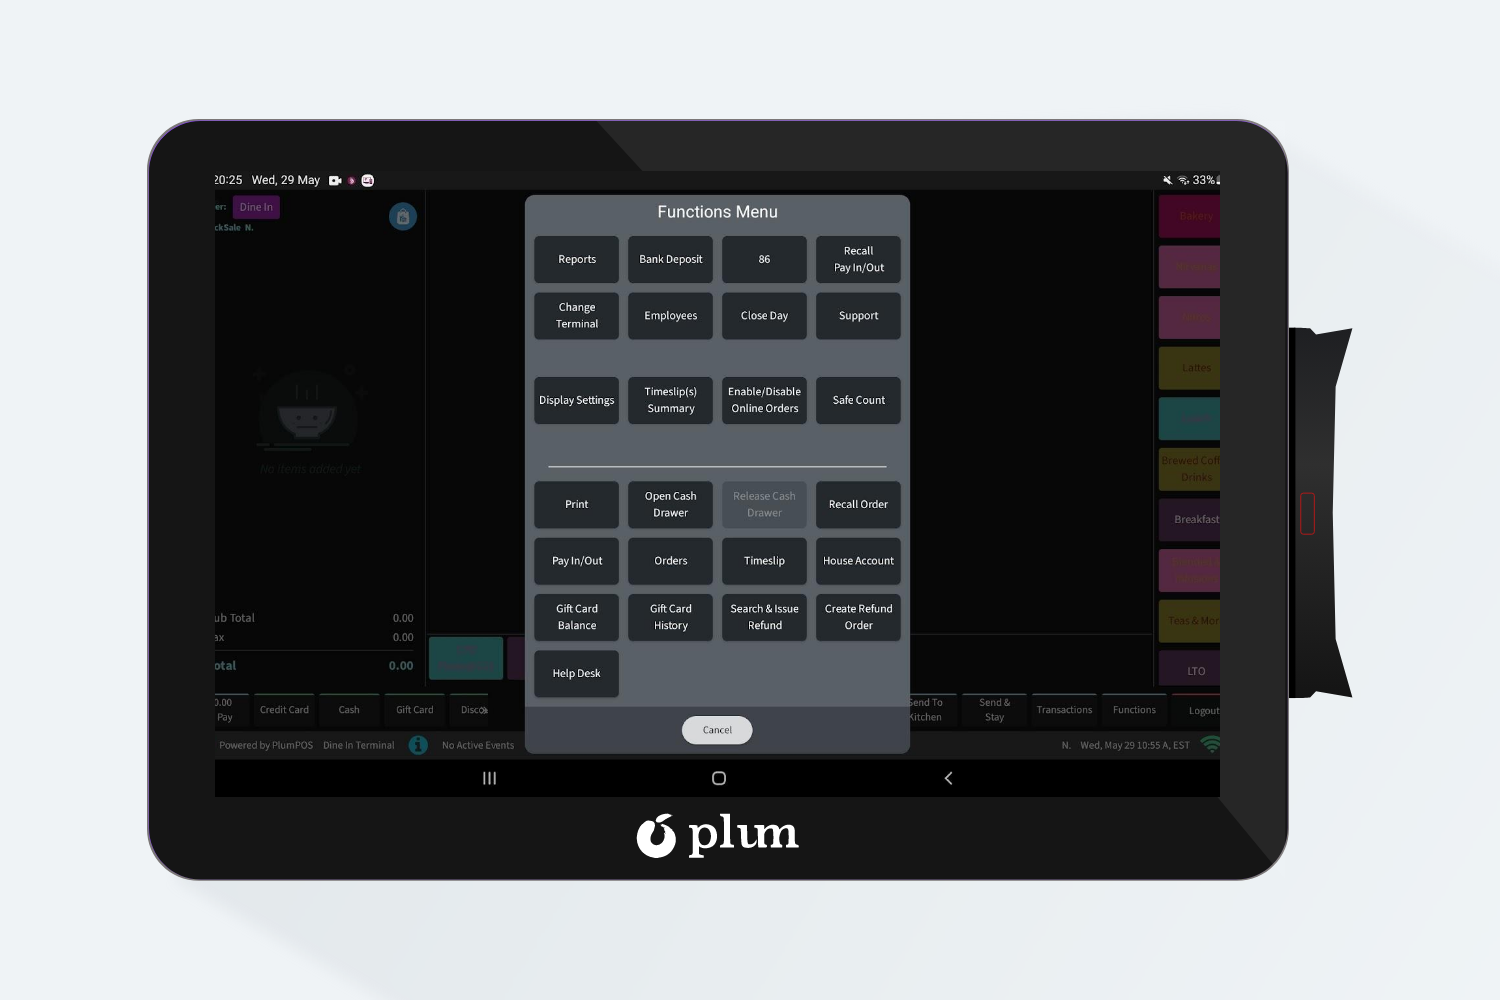
Manager Functions
Below mentioned are the Manager Functions which are accessible to only by the users which are logged in with Manager job code on the POS.
Types of Manager Functions are:
- Reports
- 86
- Recall Pay In/Out
- Change Terminal
- Employees
- Close Day
- Support
- Display Settings
- Timeslip (s) Summary
- Enable / Disable Online Orders
- Safe Count

- Reports: On POS, there are different types of reports which allow users to track different types of data. Below mentioned are different types of reports on POS:
-
- Orders
- Pay In / Out
- Timeslips
- Close Report
- Sales Report
- Labor Report
- End of day check
- Per Labor Hour
- Credit Card Batch
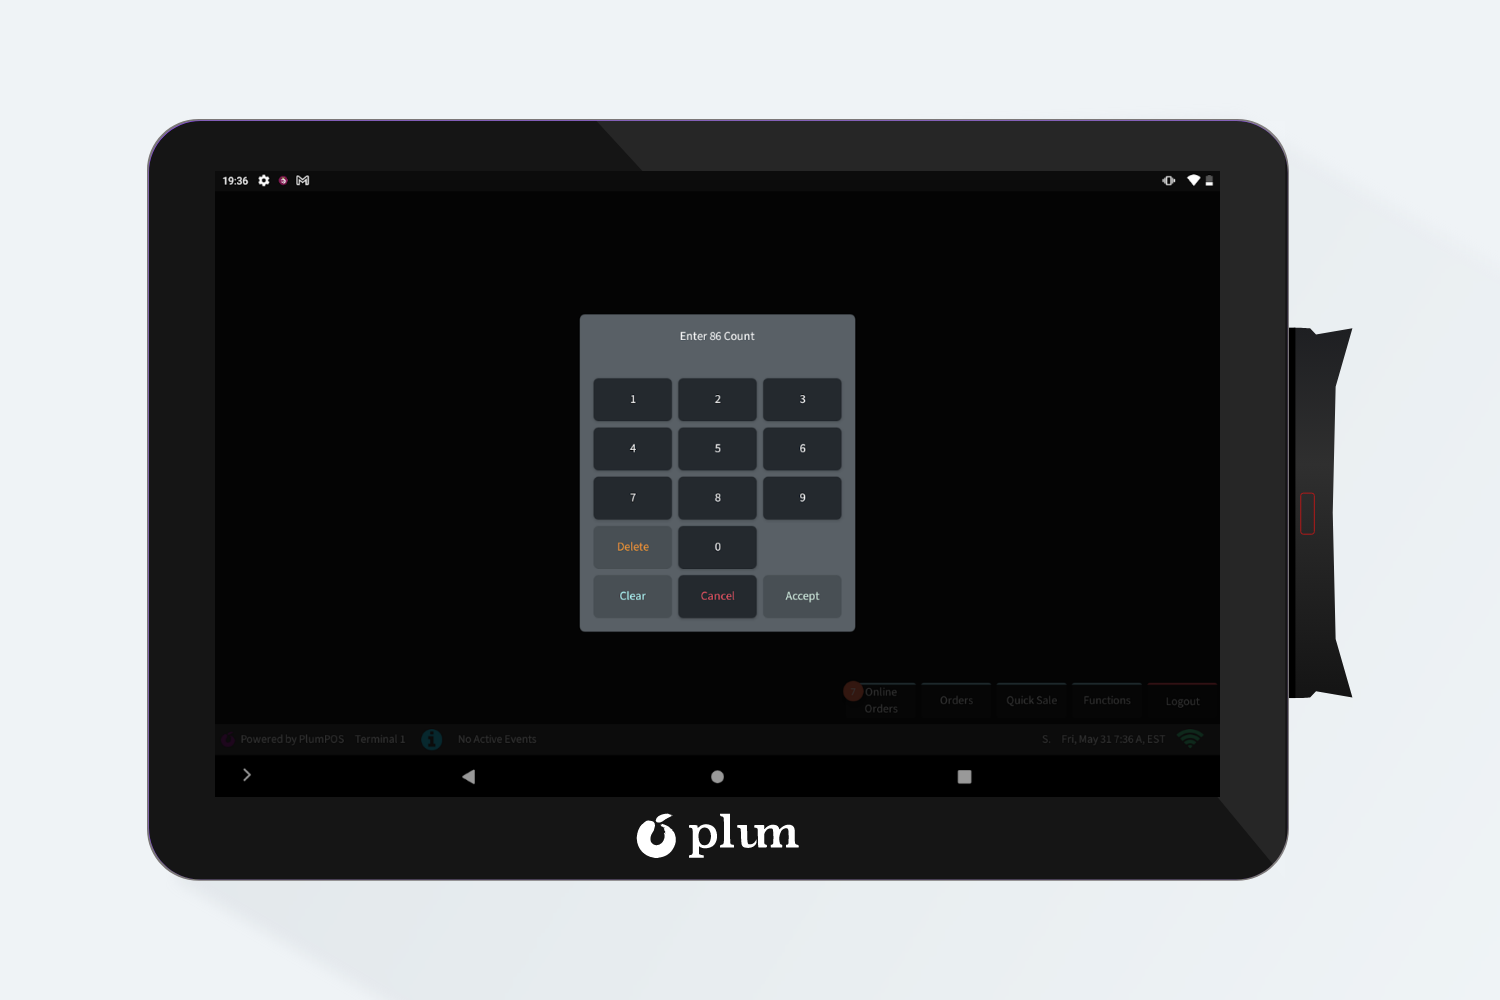
86 Functionality: In real life, it might be possible that the store may run out of some items and is only left with some quantity of items that can be sold. So, to show that count on the menu item button, the user needs to mark that item in the 86-item list.
Mark an item as 86 items, following steps should be performed:
Step 1: Click on the 86 buttons.
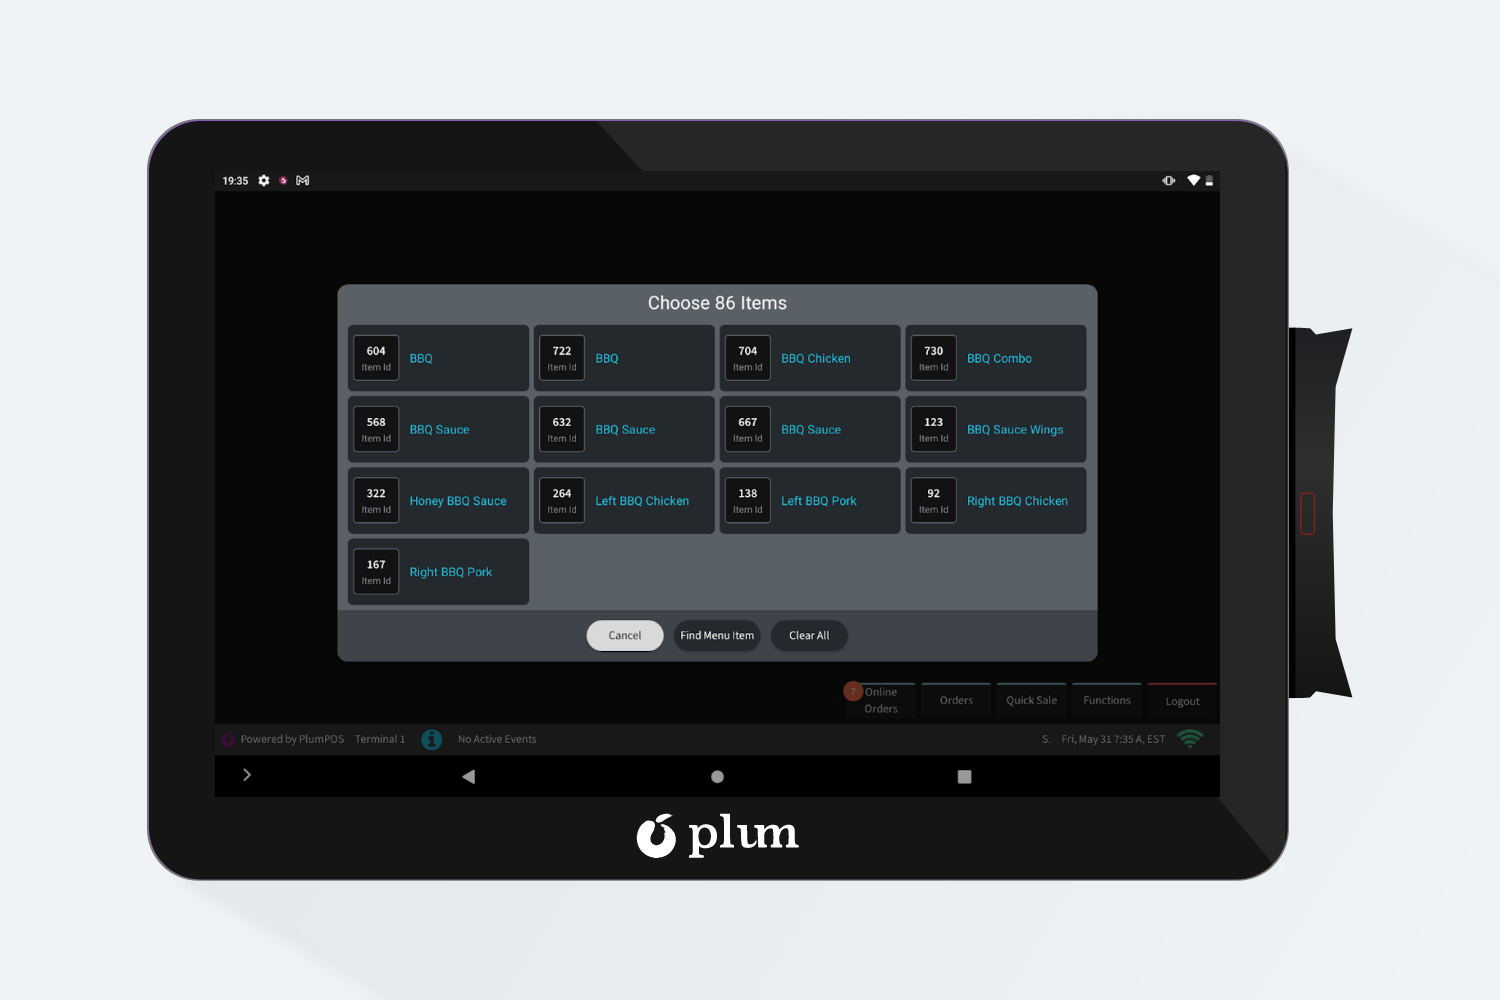
Step 2: Click on the “Find menu item” button on the 86 items pop-up.
Step 3: Search for that item and click on the “Change Nix” button to enter the count.
Step 4: Once the count is entered then the item will be listed as 86 items.
Step 5: If the user wants to remove it from the 86 list, click on the Clear button and the item will be removed.
For e.g. Let’s search and select the BBQ Chicken [Menu Item] in the 86 item and change the Nix value as shown below.

-
Recall Pay In/Out
If a user wants to view details of any Pay In OR Pay out, which was created in the past, then it can be done by this function.
Follow the below mentioned steps to perform “Recall Pay In/Out”
Step 1: Click on the “Recall Paying/Out” button.
Step 2: Enter the Payment ID of the Pay In/Out, that needs to be recalled
Step 3: Details will be displayed on IPA.
-
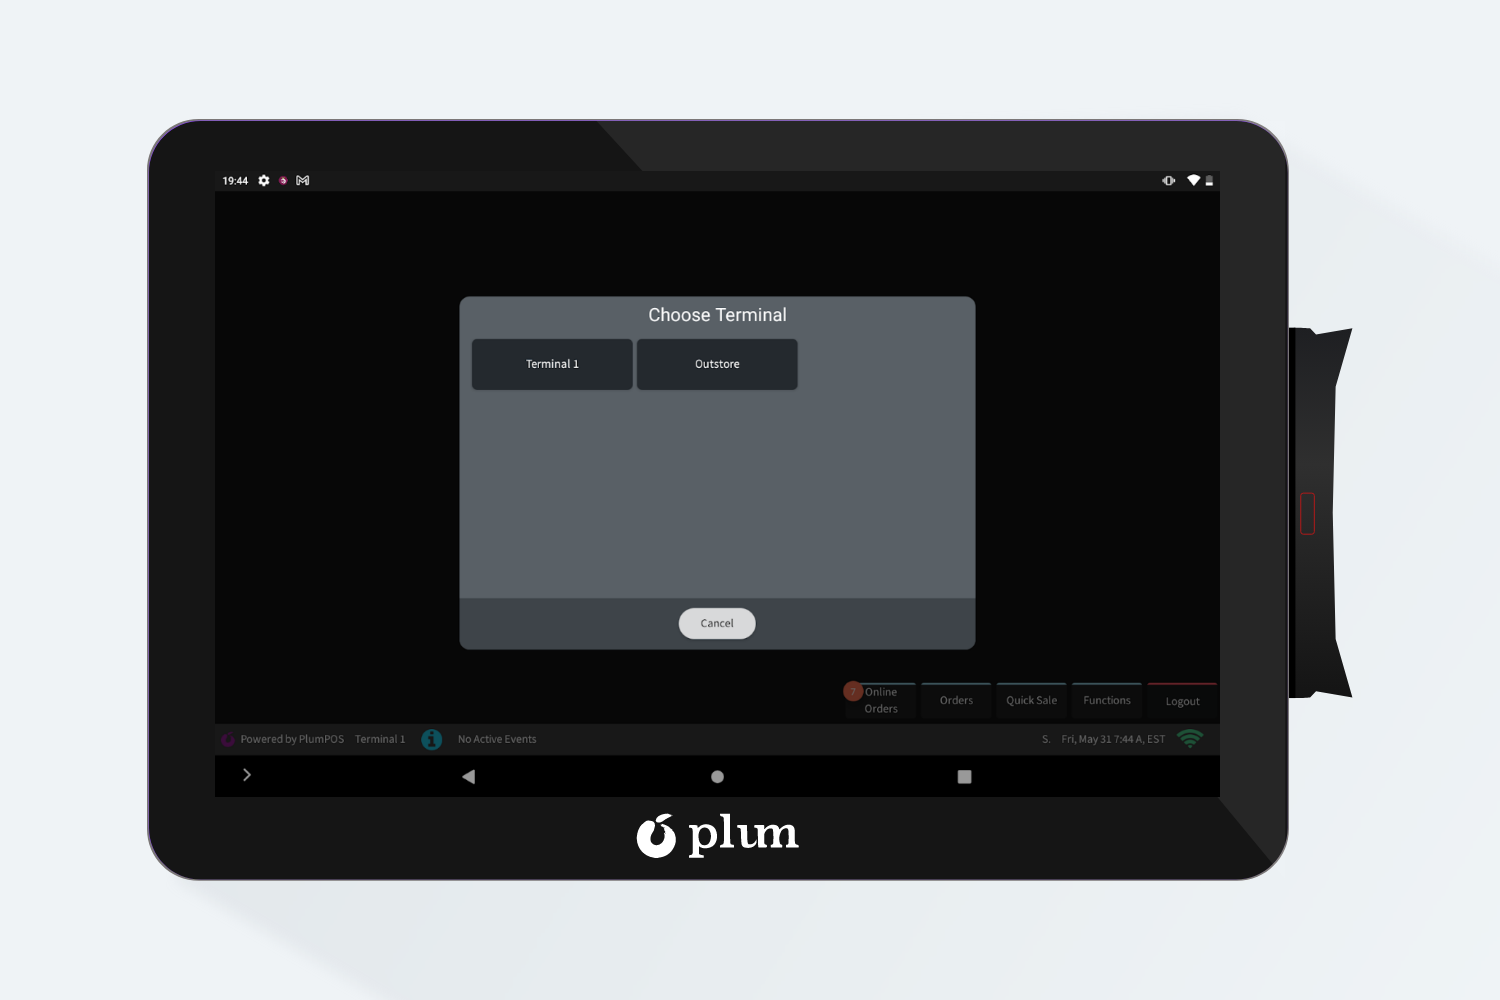
Change Terminal
Here are multiple Terminal Setups that are created under Site Settings in Plum. Now, if the manager wants to switch between those terminals, then it can be done by this function.
Once the user selects the Terminal to which he wants to navigate, he will be landed on the login screen and then he can enter the site PIN and login.
-
Employees
On clicking on this user will be navigated to the following screen :
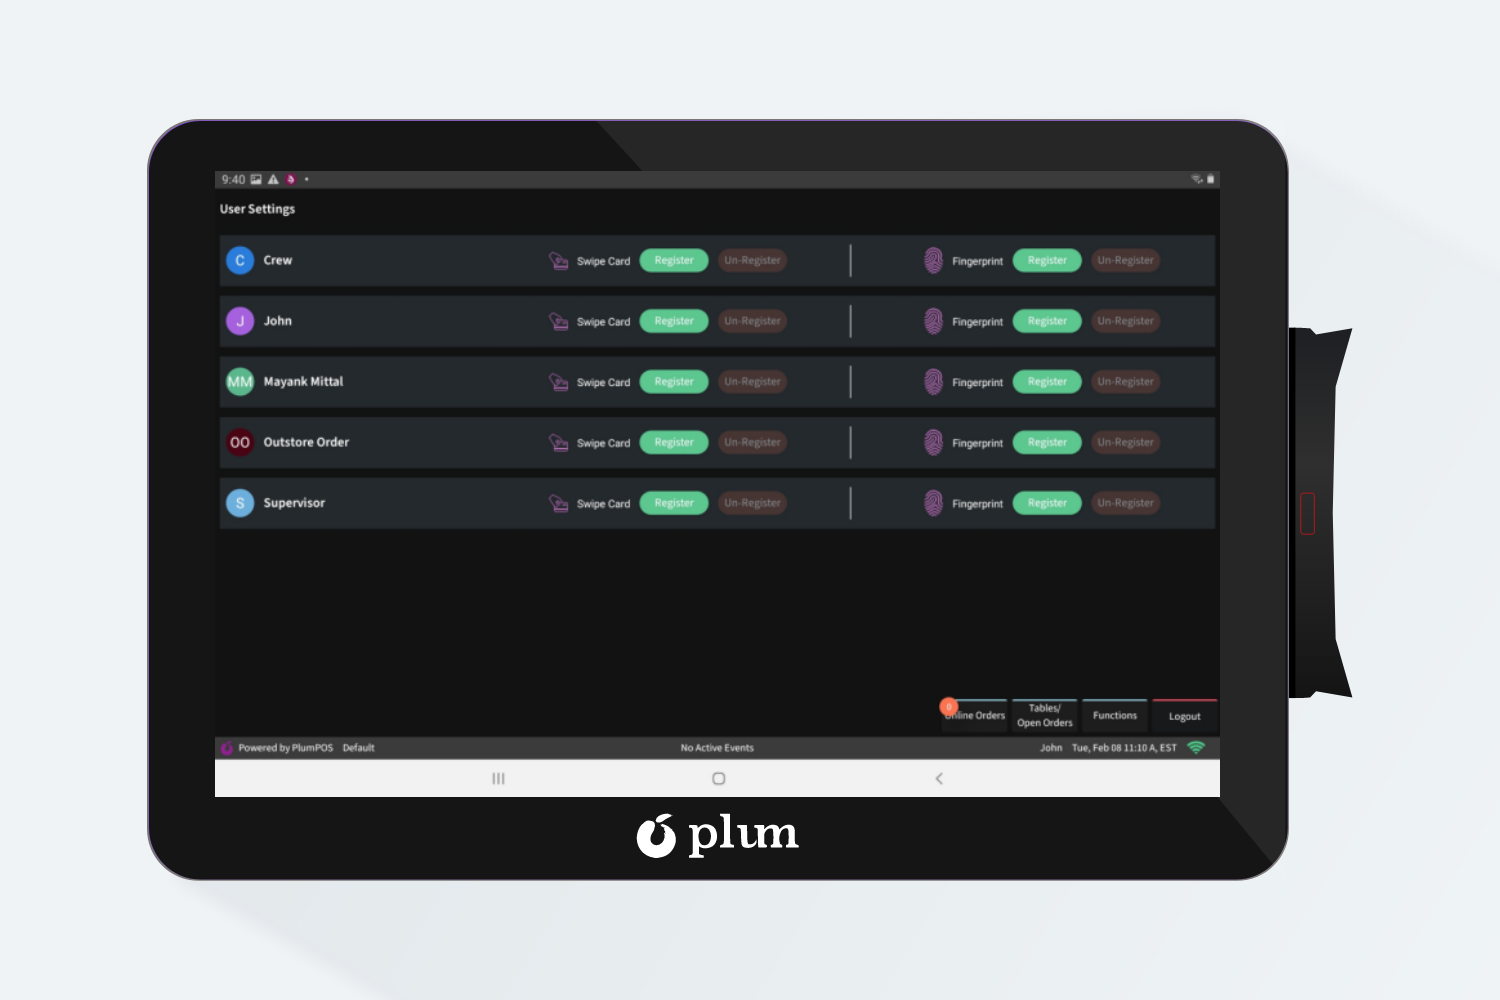
On this screen, all the employees added for this store in Plum will be displayed on this screen.
Users can register Fingerprints and Employee cards for all the employees, through which they can clock in on Terminal.
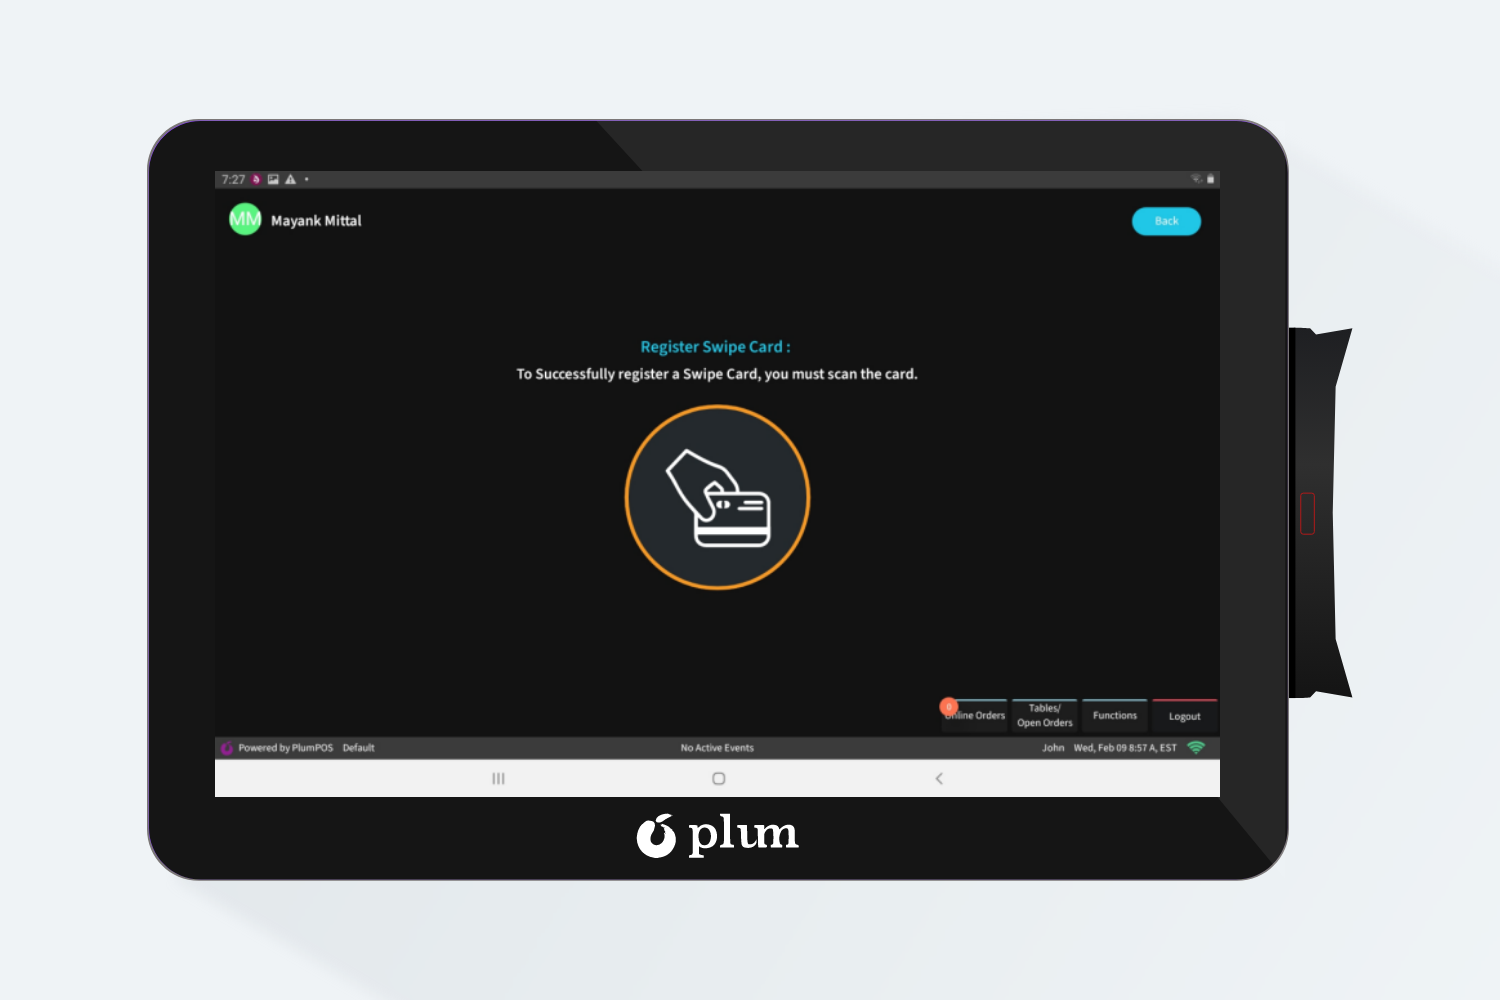
To register Employee Card, perform following steps:
Step 1: Click on the “Register” screen and the following screen will be displayed.
Step 2: Swipe the employee card onto the swipe reader.
Step 3: The card will be registered, and the employee can now clock in via swiping that registered card on Terminal.
Step 4: To unregister the card, click on the “Un-Register” [button].
To register Fingerprint, perform following steps:
Step 1: Click on the “Register” screen and the following screen will be displayed.
Step 2: Click on “I agree” to accept the terms and conditions and continue with registering fingerprints.
Step 3: Following screen will be displayed.
Step 4: Tap on the biometric reader 4 times to register the fingerprint successfully.
Step 5: The fingerprint will be registered, and the employee can now clock in via registered fingerprint.
Step 6: To unregister the fingerprint, click on the “Unregister” button.
-
Close Day
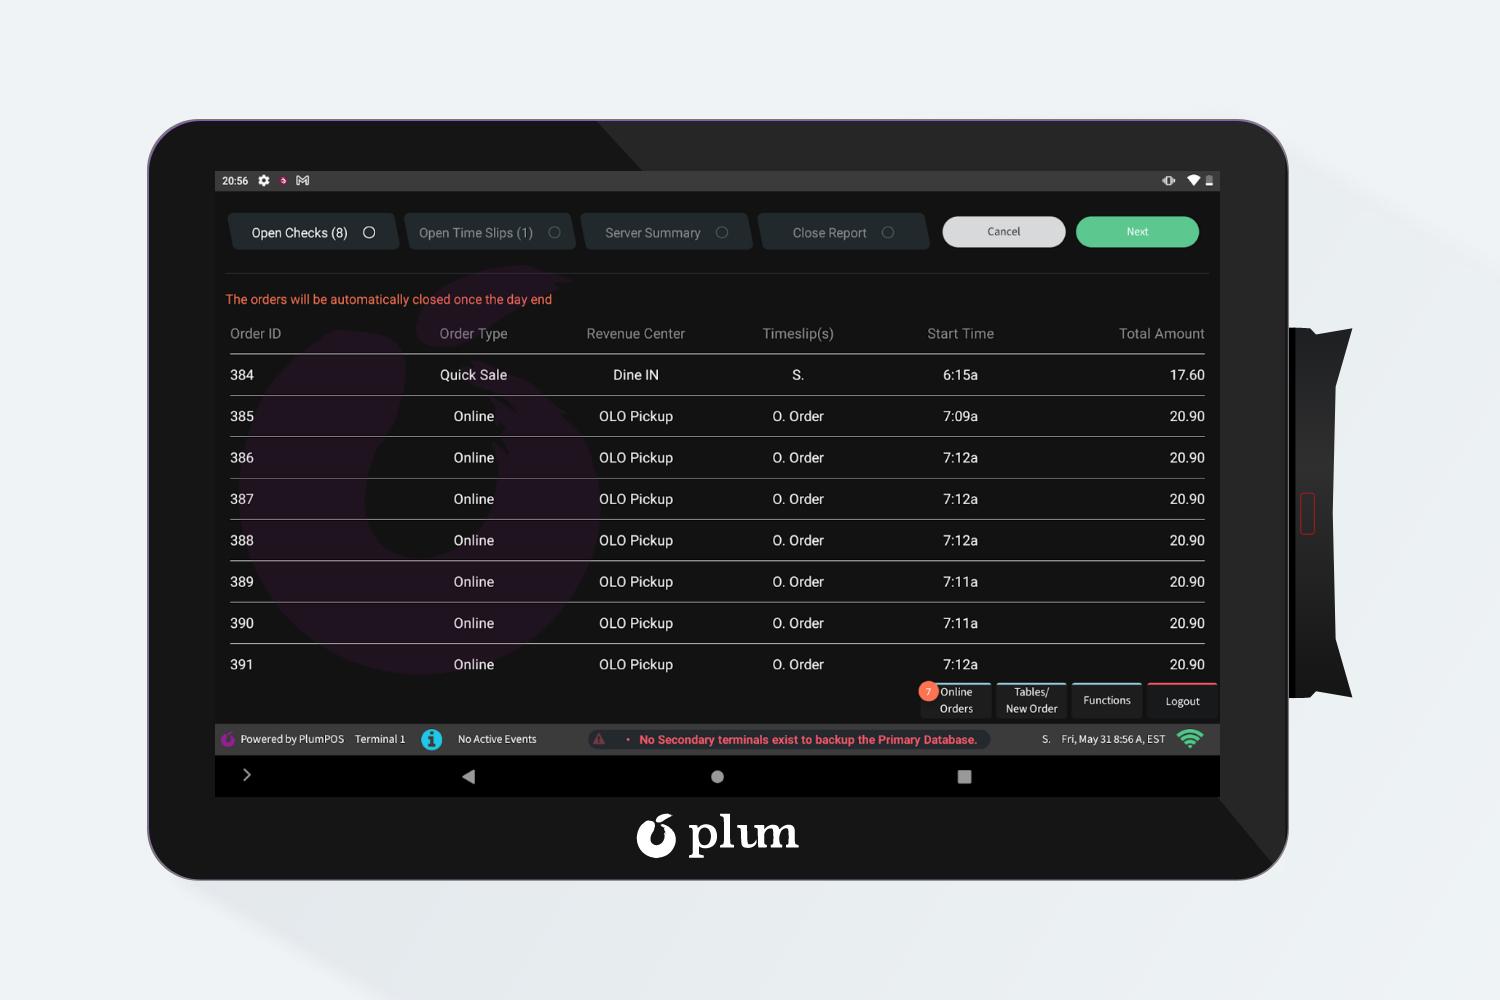
Using this function, the manager can close the day for the store when all the sales are made on that current day and can also view the following details while performing the close day functionality.
-
- Open Checks : In this screen, all the open checks on the store are displayed.
-
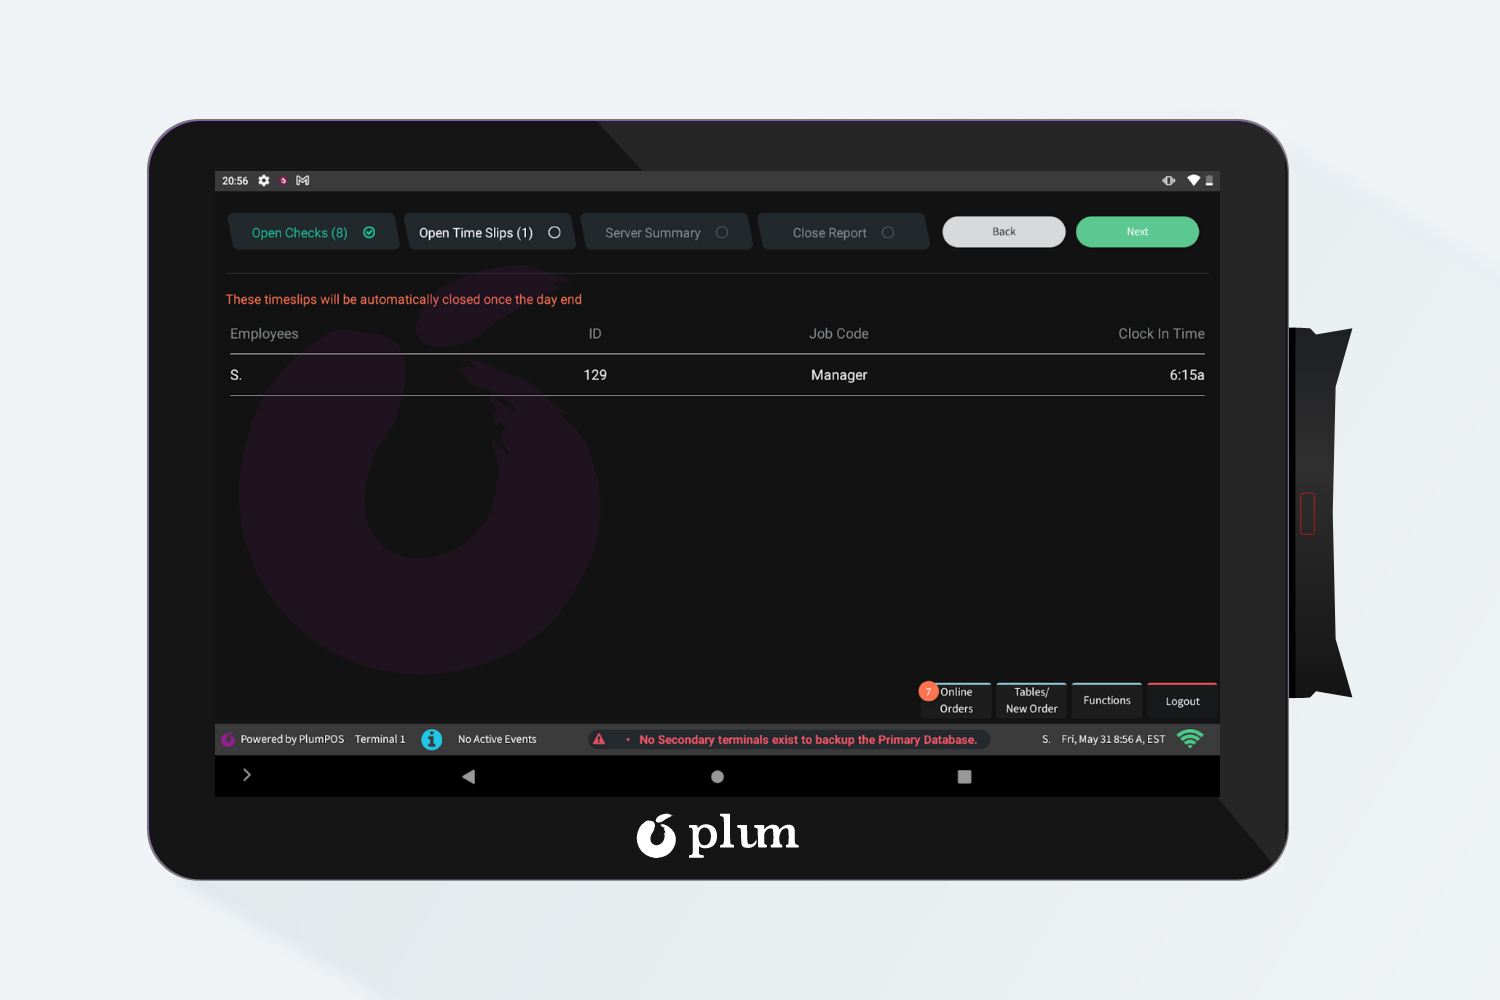
- Open Timeslips: All the current open timeslips are displayed on this tab.
-
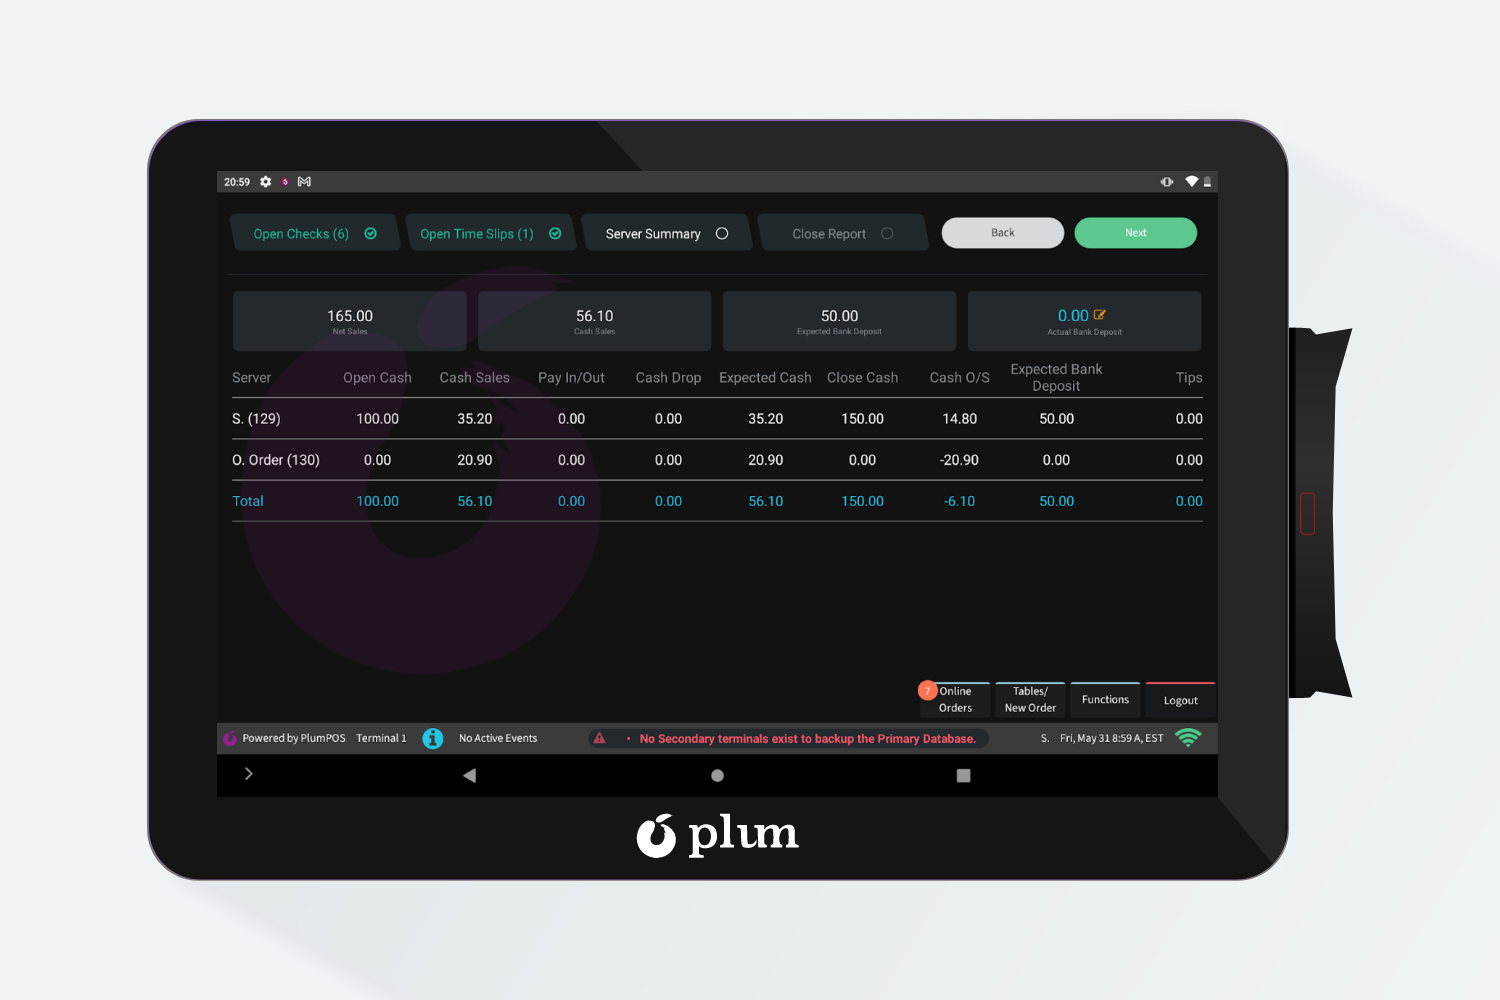
- Server Summary : In this tab, the sales of the store and the details of all the closed and open timeslips are displayed with their sales, tips, discounts, comps and voids and other data
-
- Close Report : The Day close report of the store is displayed in this tab. Users can view the sales data of the store done by all the timeslips.
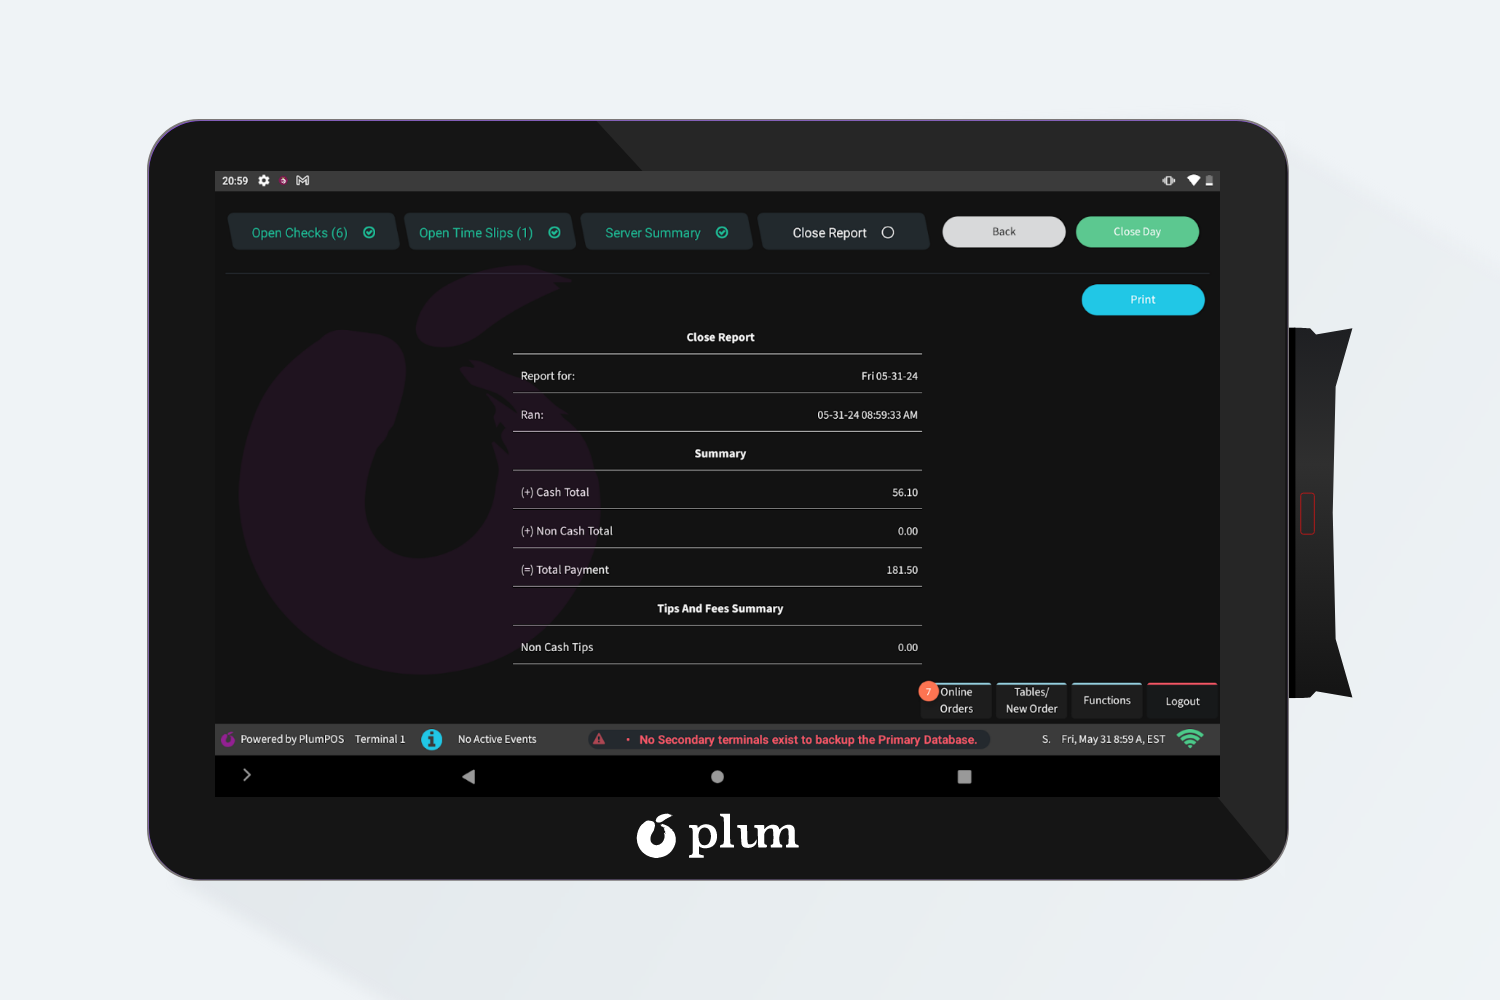
After viewing all the data, to close the day, click on the “Close Day” button and the day will be closed.
-
Support
On clicking on this button, another pop-up is displayed with some more additional functionality that we provide to manager which is as followed:
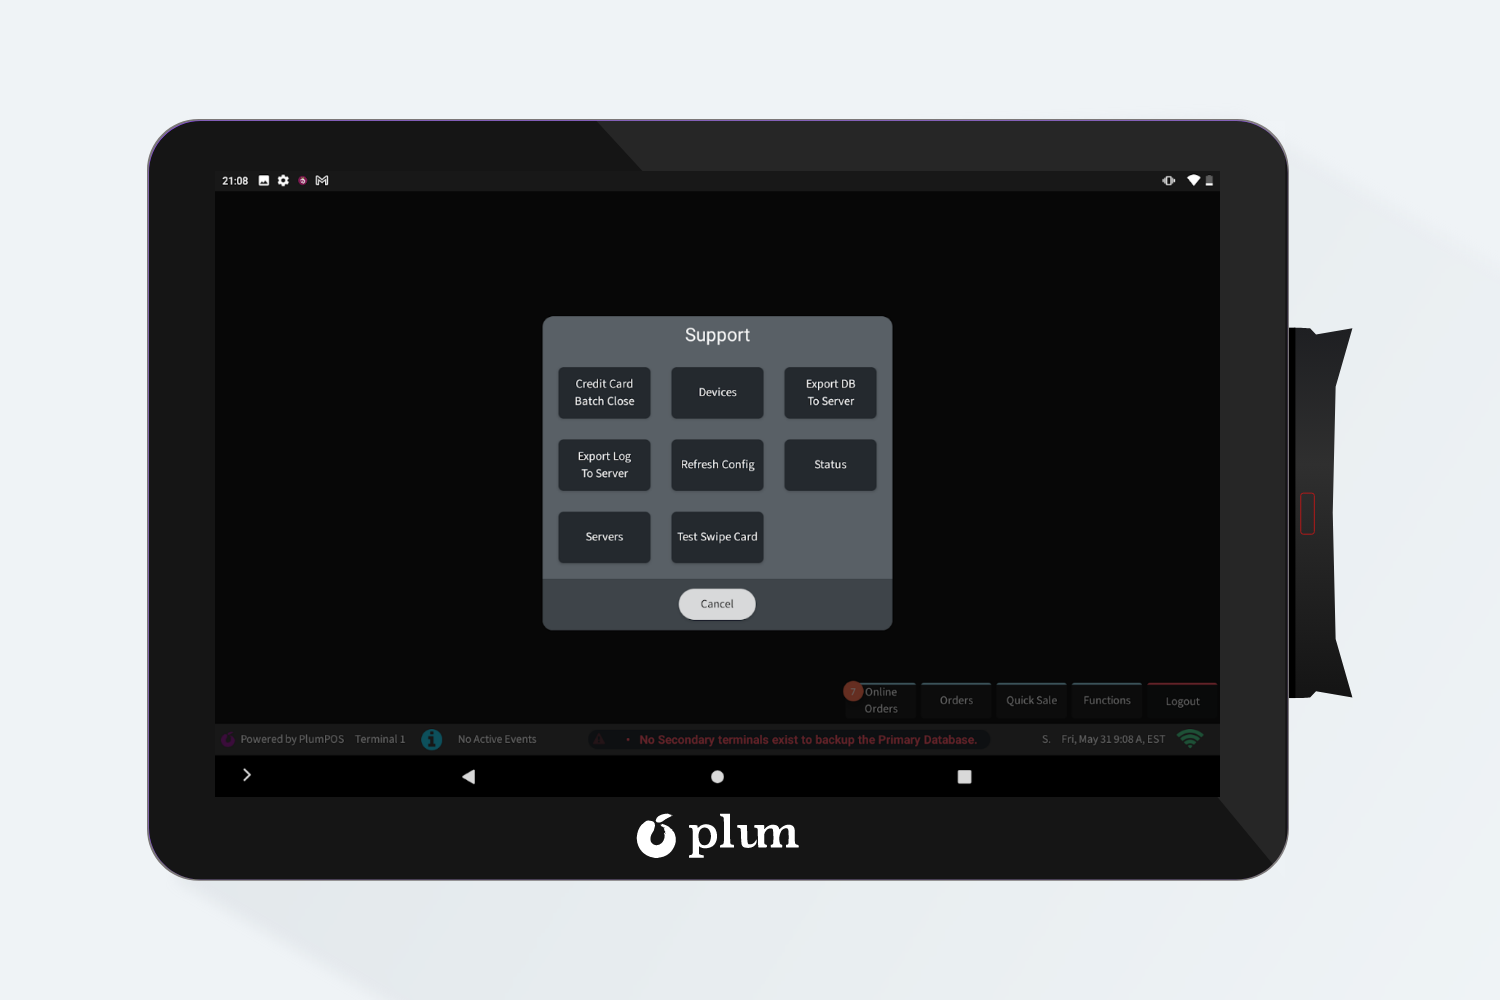
Let’s discuss all the functions one-by-one:
- Credit Card Batch Close : By clicking this user can perform the Batch close functionality from Plum POS device.
- Devices : On this screen, users can view all the branded terminals with their IP address.
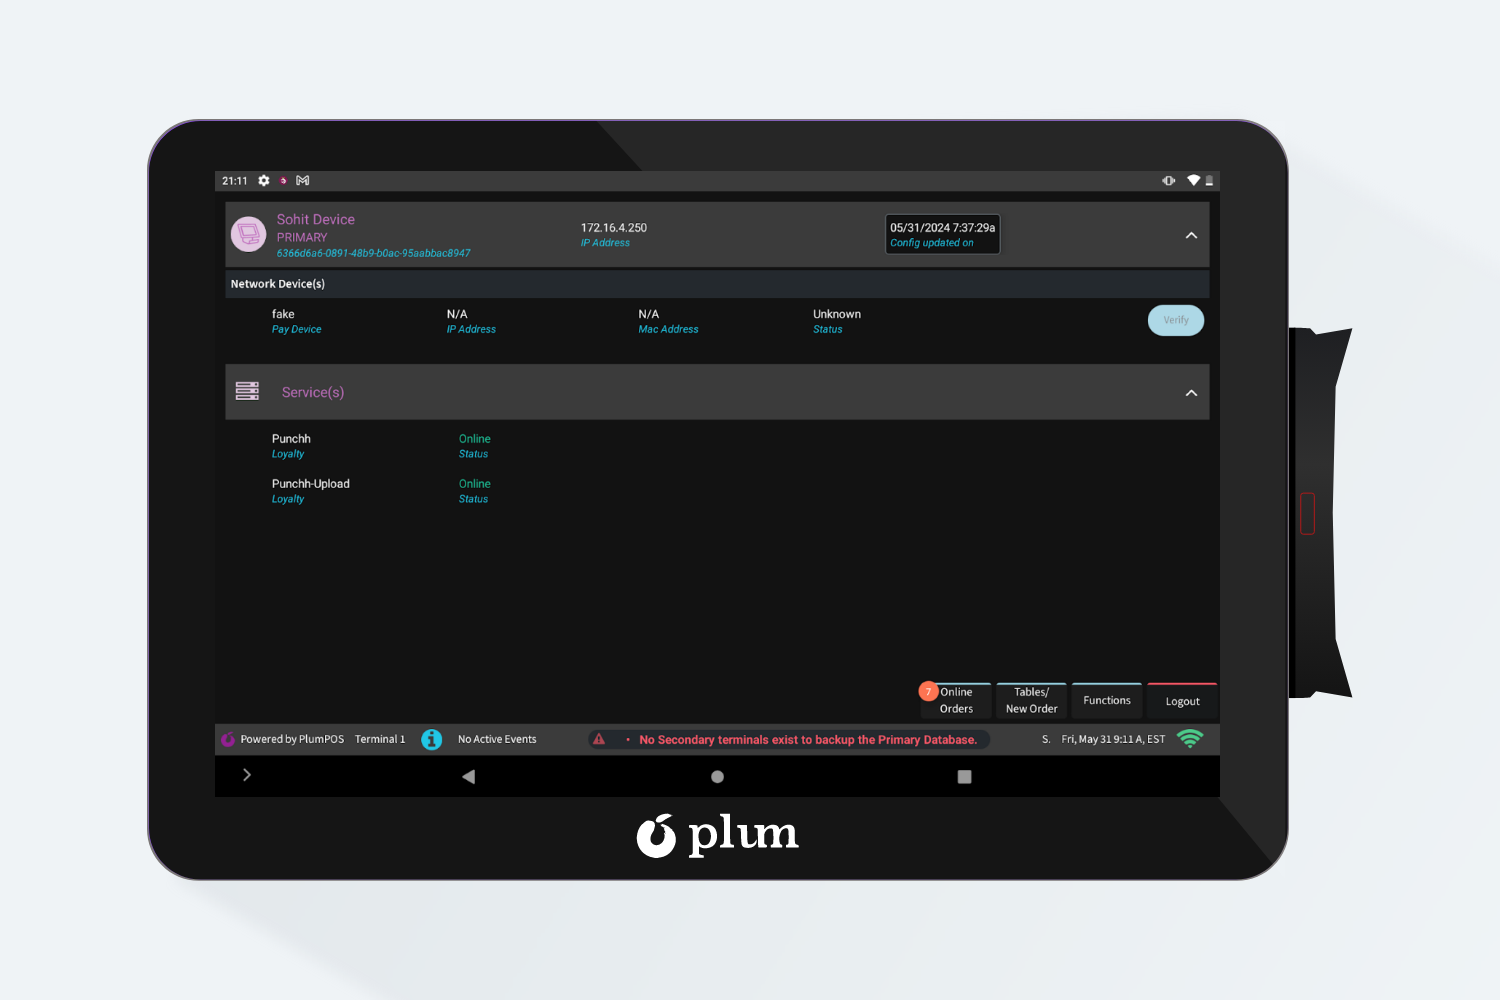
The connected Printers, Credit Card reader and other network devices details are also displayed here. If the user has integrated Punchh and gift cards also, then it is also present under the “Services” section.
- Export DB to Server: On clicking on this button, the DB of the account will be exported to server, that Web team can access and check it to troubleshoot any error
- Export logs to server: On clicking on this button, the logs will be exported to server, that Hubworks team can access and check to troubleshoot any error.
- Refresh Config: When data is pushed from Hubworks and reaches the TX server, it takes 1 minute for the PA server to fetch the updated data from TX to show it on IPA. If, in any case, the manager wants to instantly show the updated data on IPA, then he can click on “Refresh Config” and PA will instantly communicate with TX.
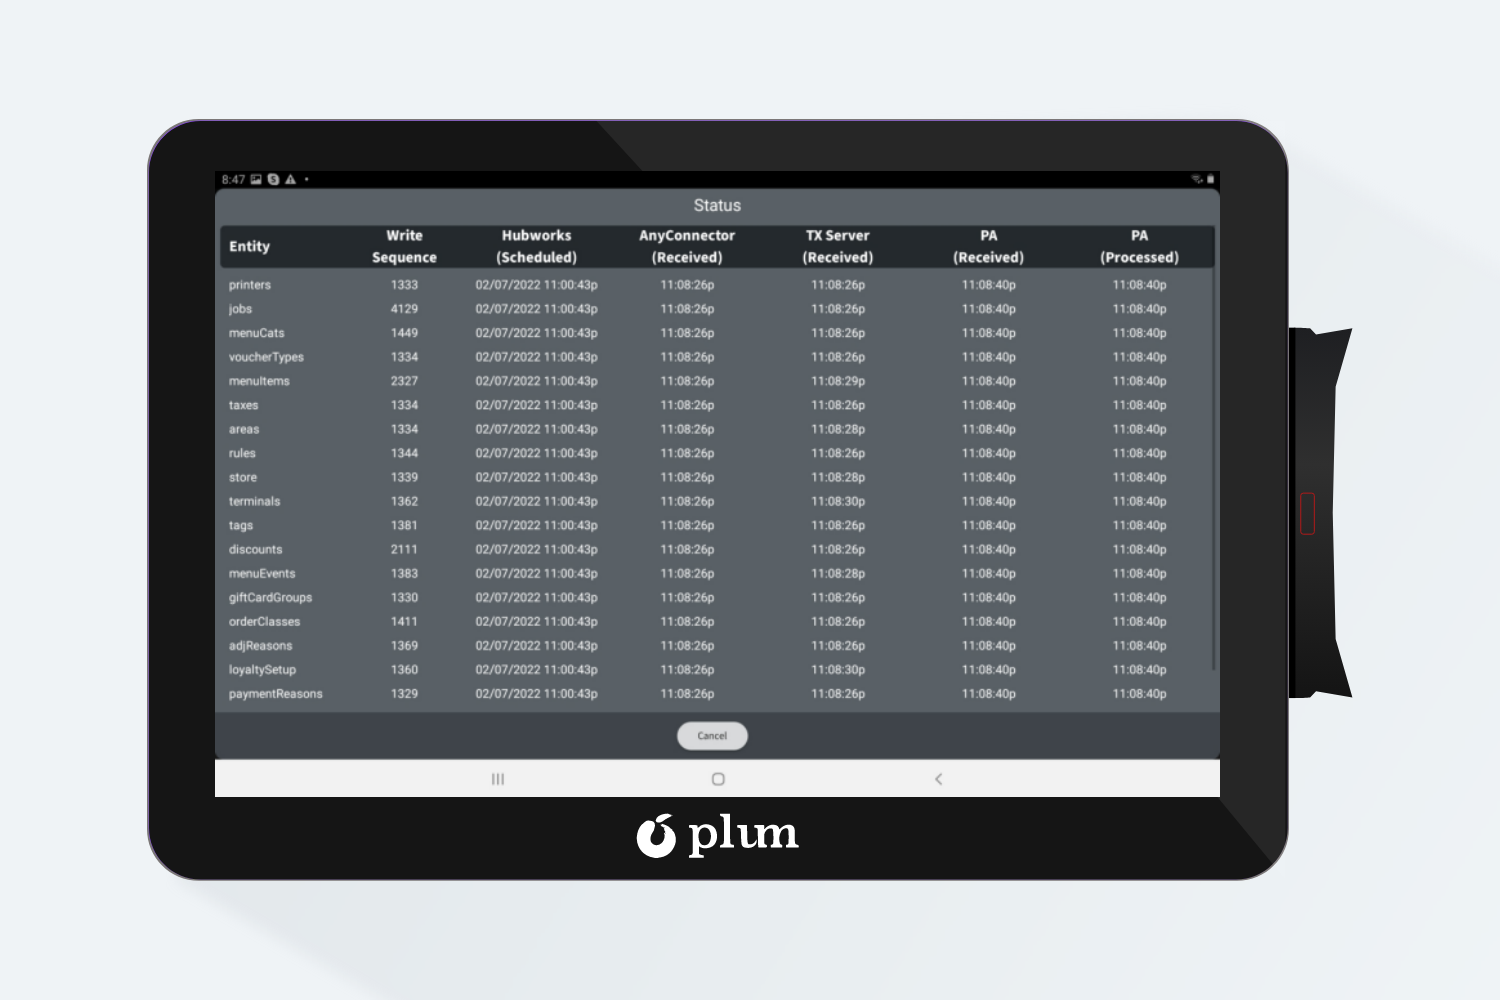
- Status: On this screen, the manager can view the status of data of all the entities.
These are all the functions that a manager type employee can perform on IPA.
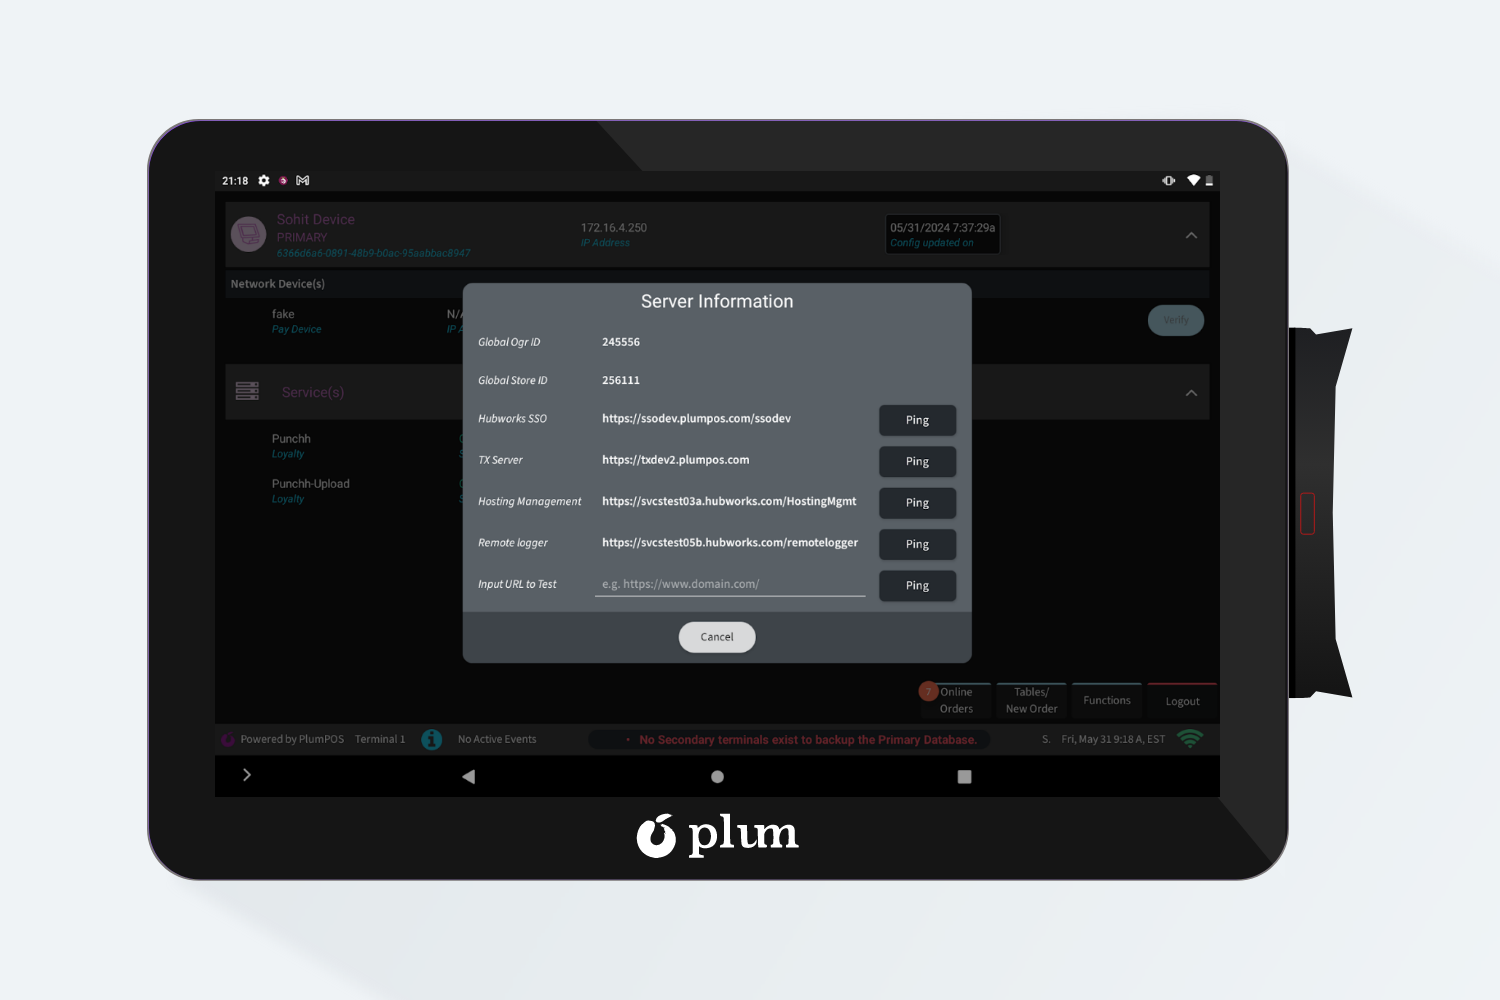
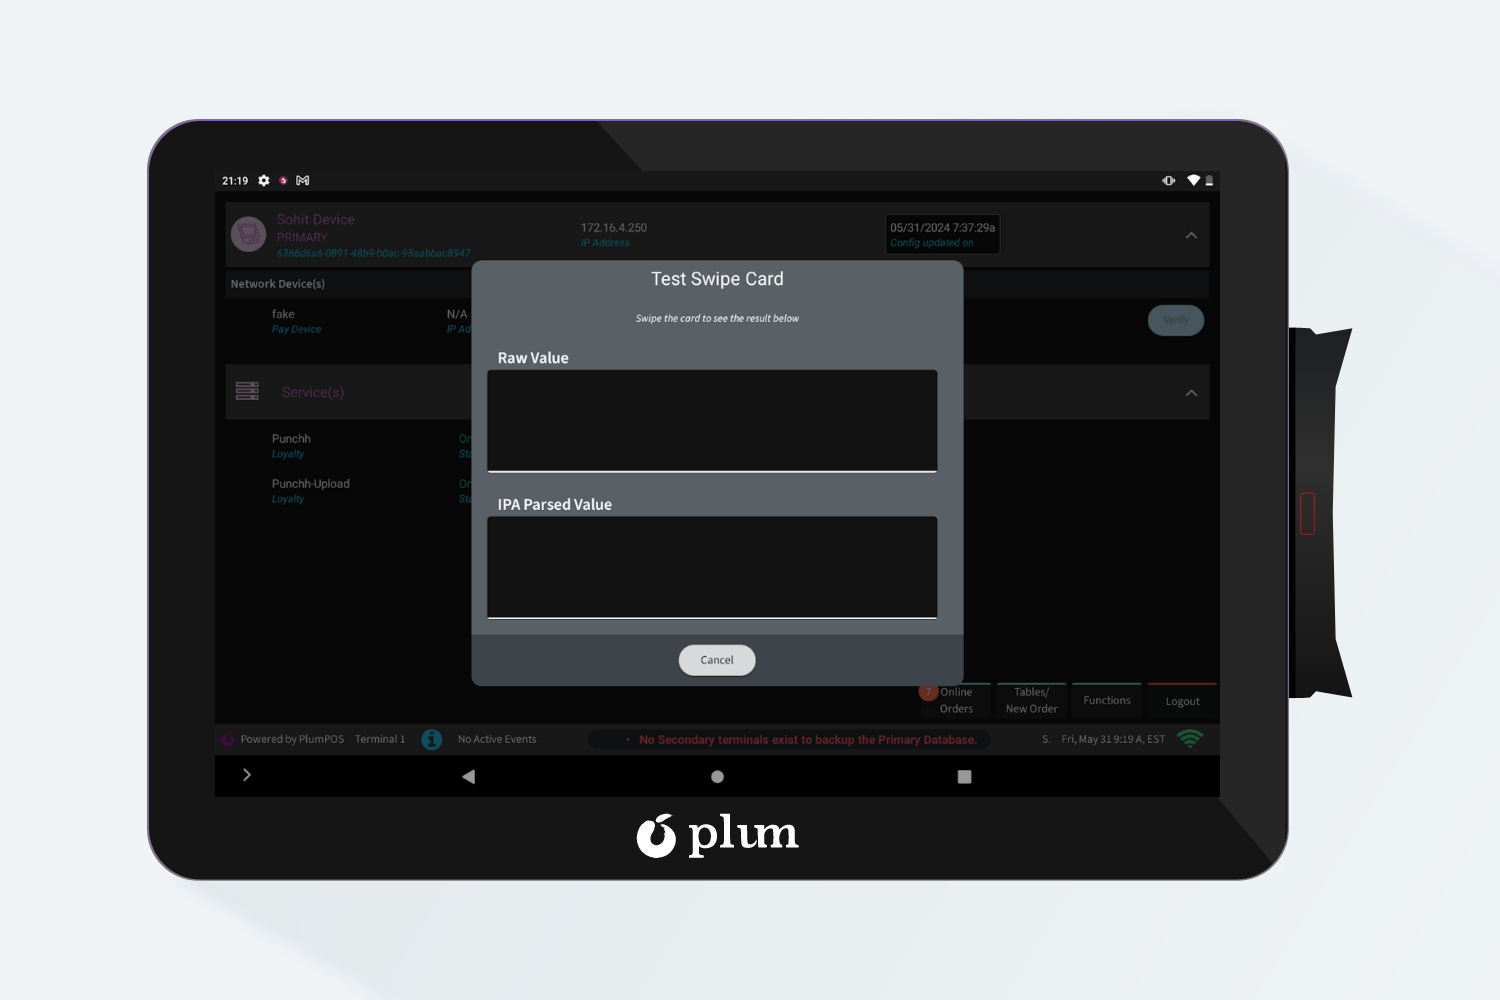
- Servers: In this module users can check their network connections by using the Ping button for different servers.
- Test Swipe Card: By using this functionality users can check if their credit cards are operational or not, on swiping it will show the card’s raw and parsed value.
-
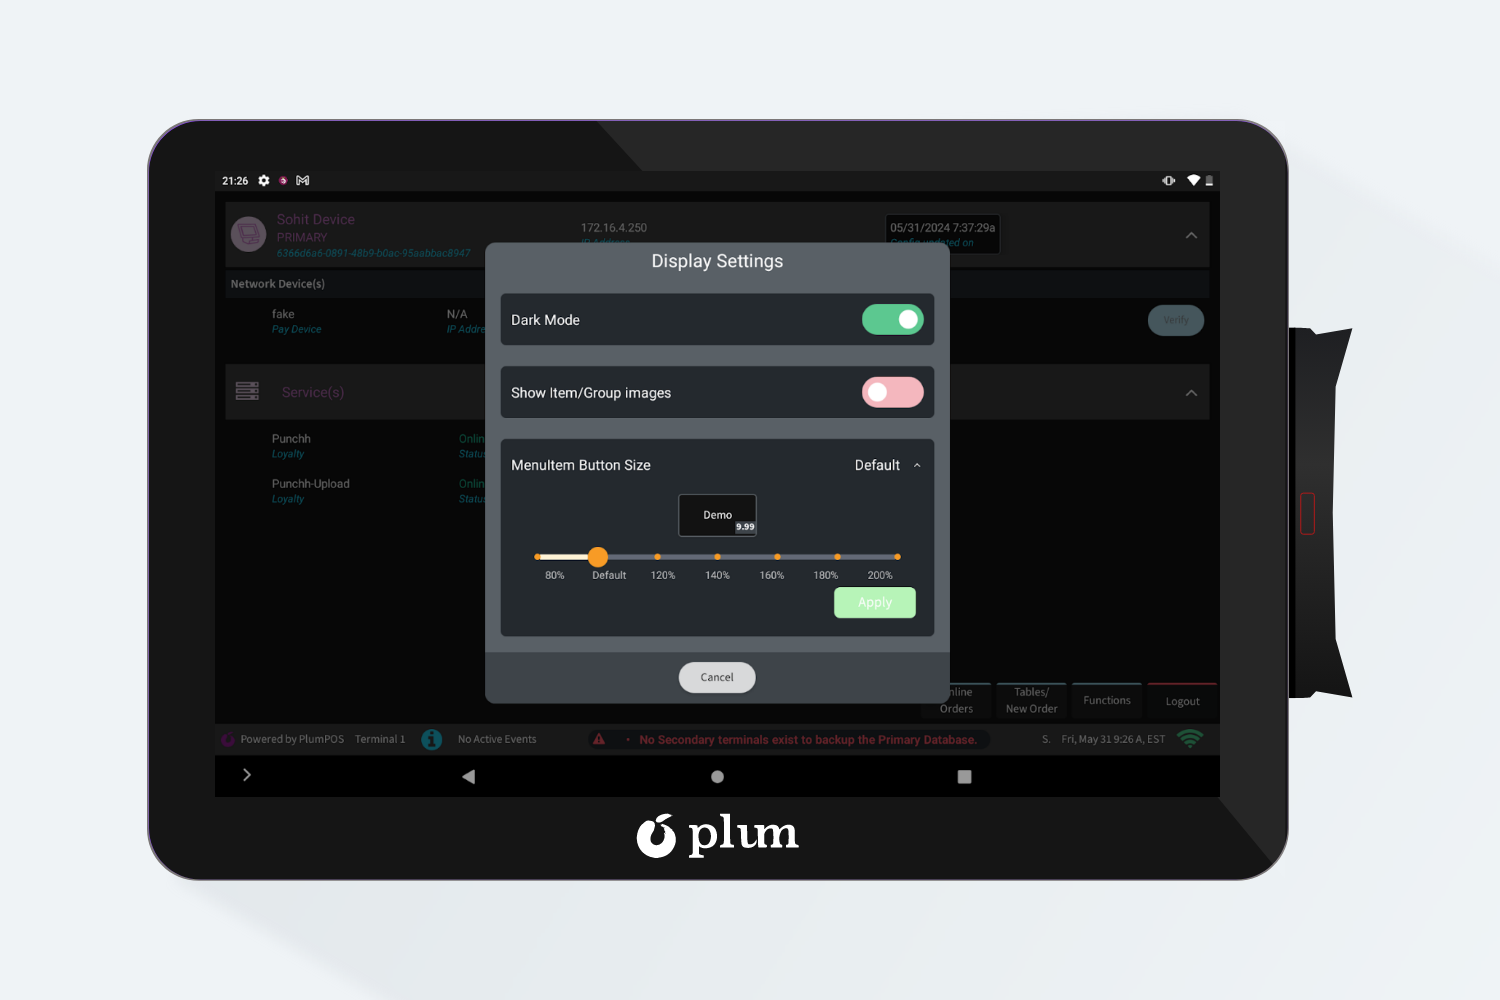
Display Settings:
This module contains 3 features that are mentioned below:
- Dark mode / Light Mode : Users can switch between dark and light by using this flag.
- Show Item/Group Images : Users can enable or disable the menu item and menu group images on IPA by using this flag.
- Menu Items Button Size: By using this functionality users can increase or decrease the Menu item Button Size.
-
Timeslip(s)
In this module users can see their and other timeslip(s) as well along with their other details like Opening Balance, Cash Sales, Paid In / Out, Cash Drop, Closing Balance, Total Cash, Cash O/S.
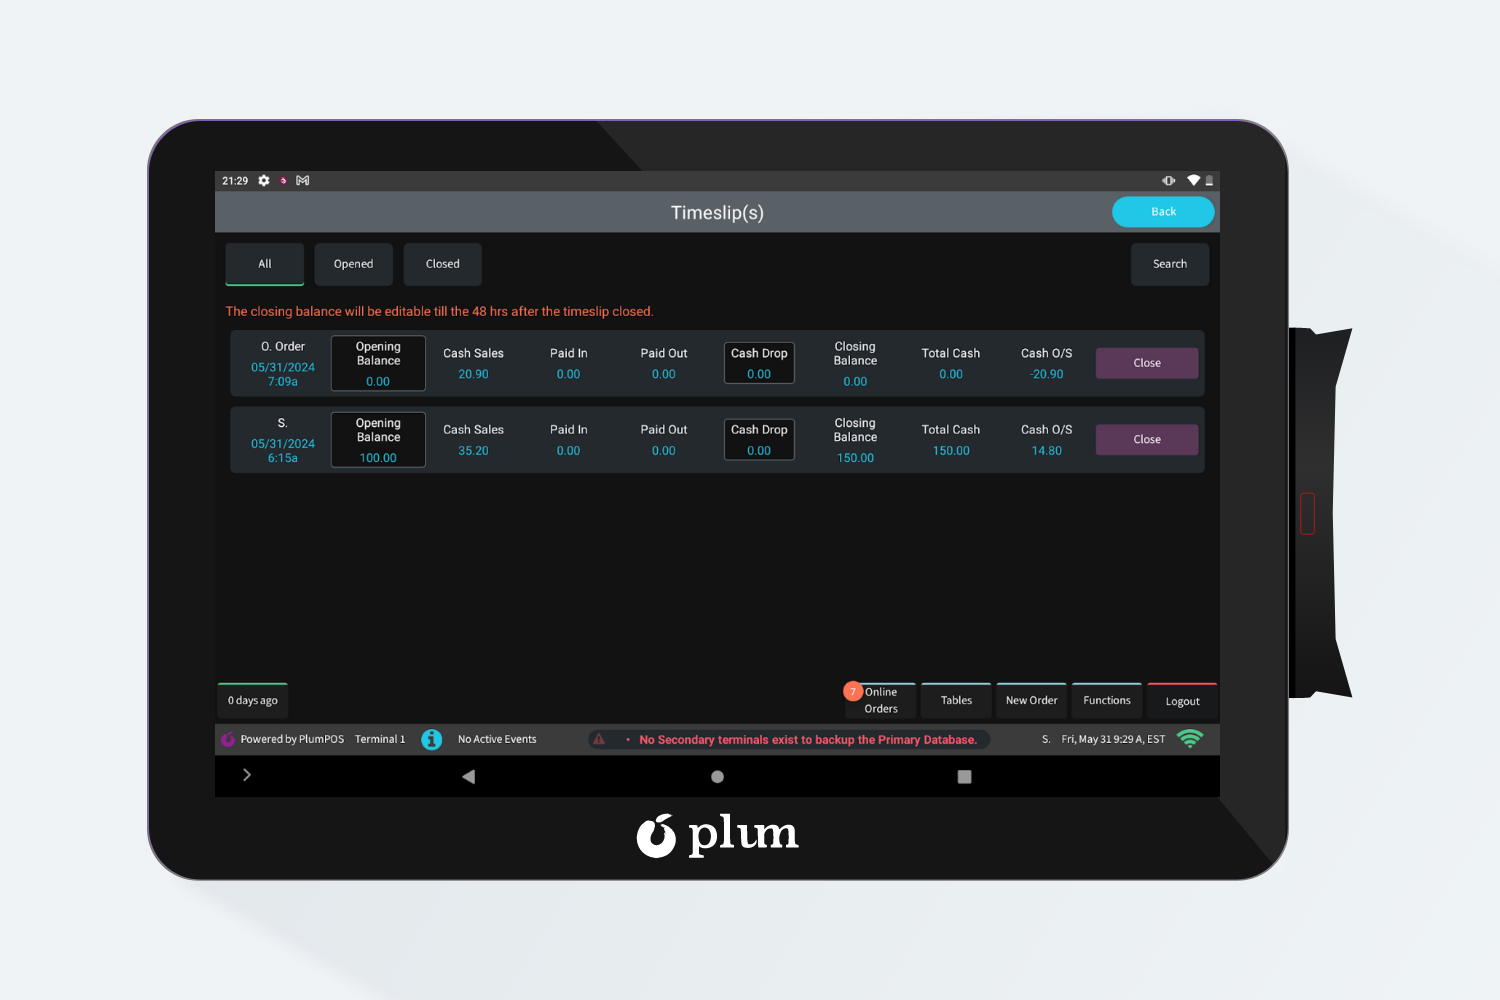
Users can also view the Open or Close timeslip(s) along with all timeslip(s)
-
Enable / Disable Online Orders
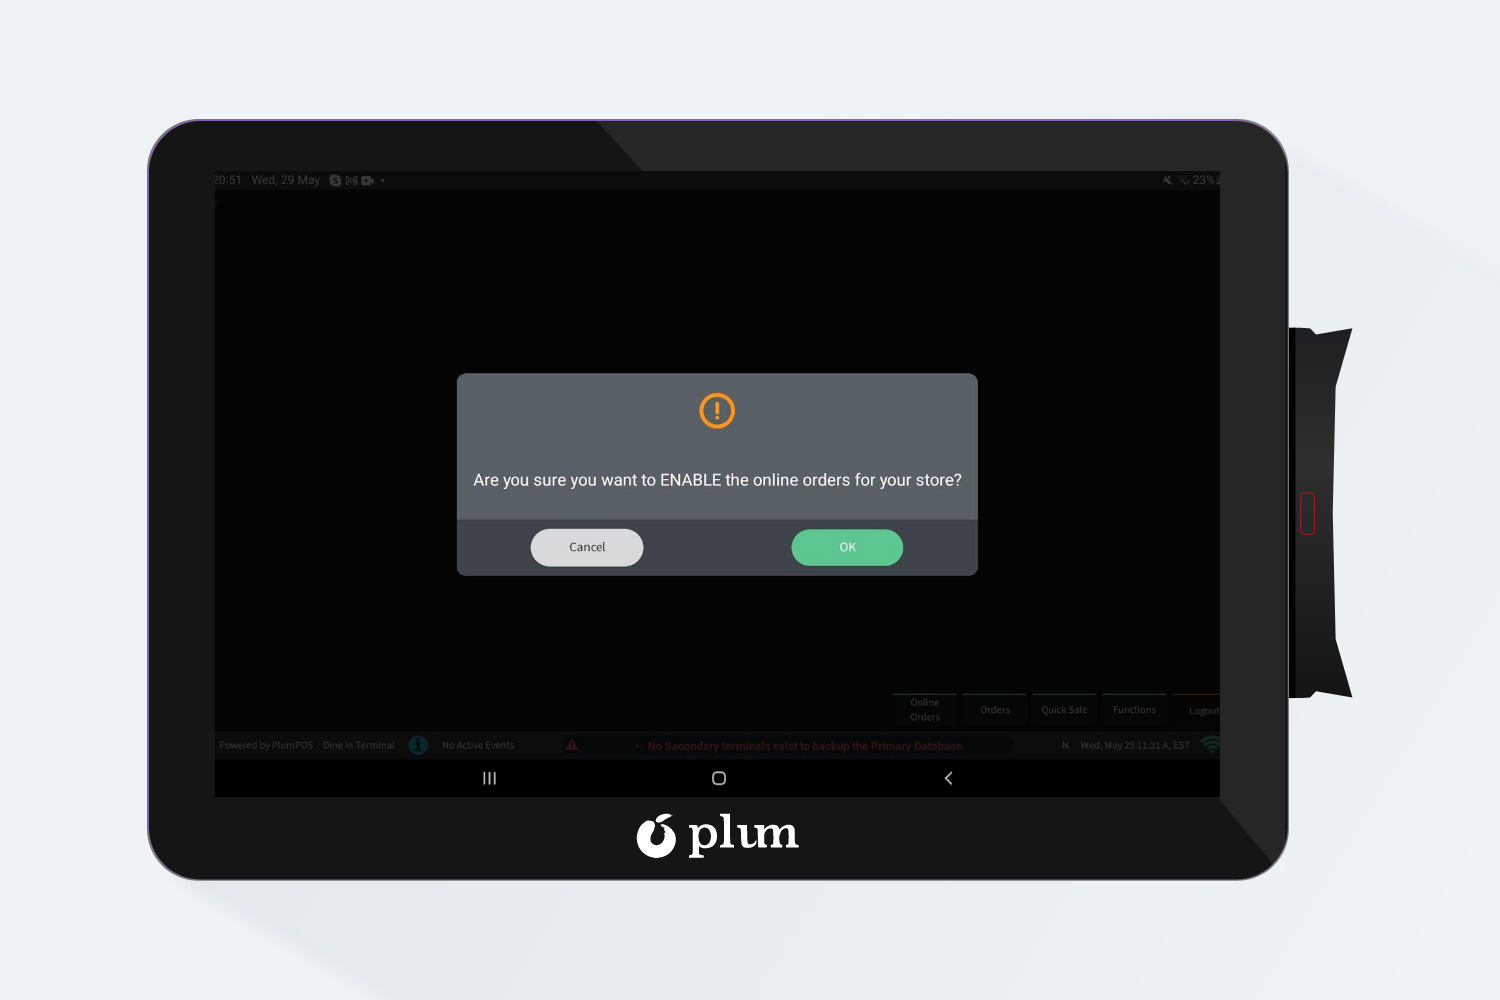
Users can click the ‘Enable / Disable Online Orders’ button in the Manager Functions to enable or disable receiving online orders in Plum POS.
If users want to ‘Enable / Disable’ Online Orders for the whole day or any particular time duration in Plum POS, we have provided this option in the Enable/Disable button. For reference, screenshots are attached below.
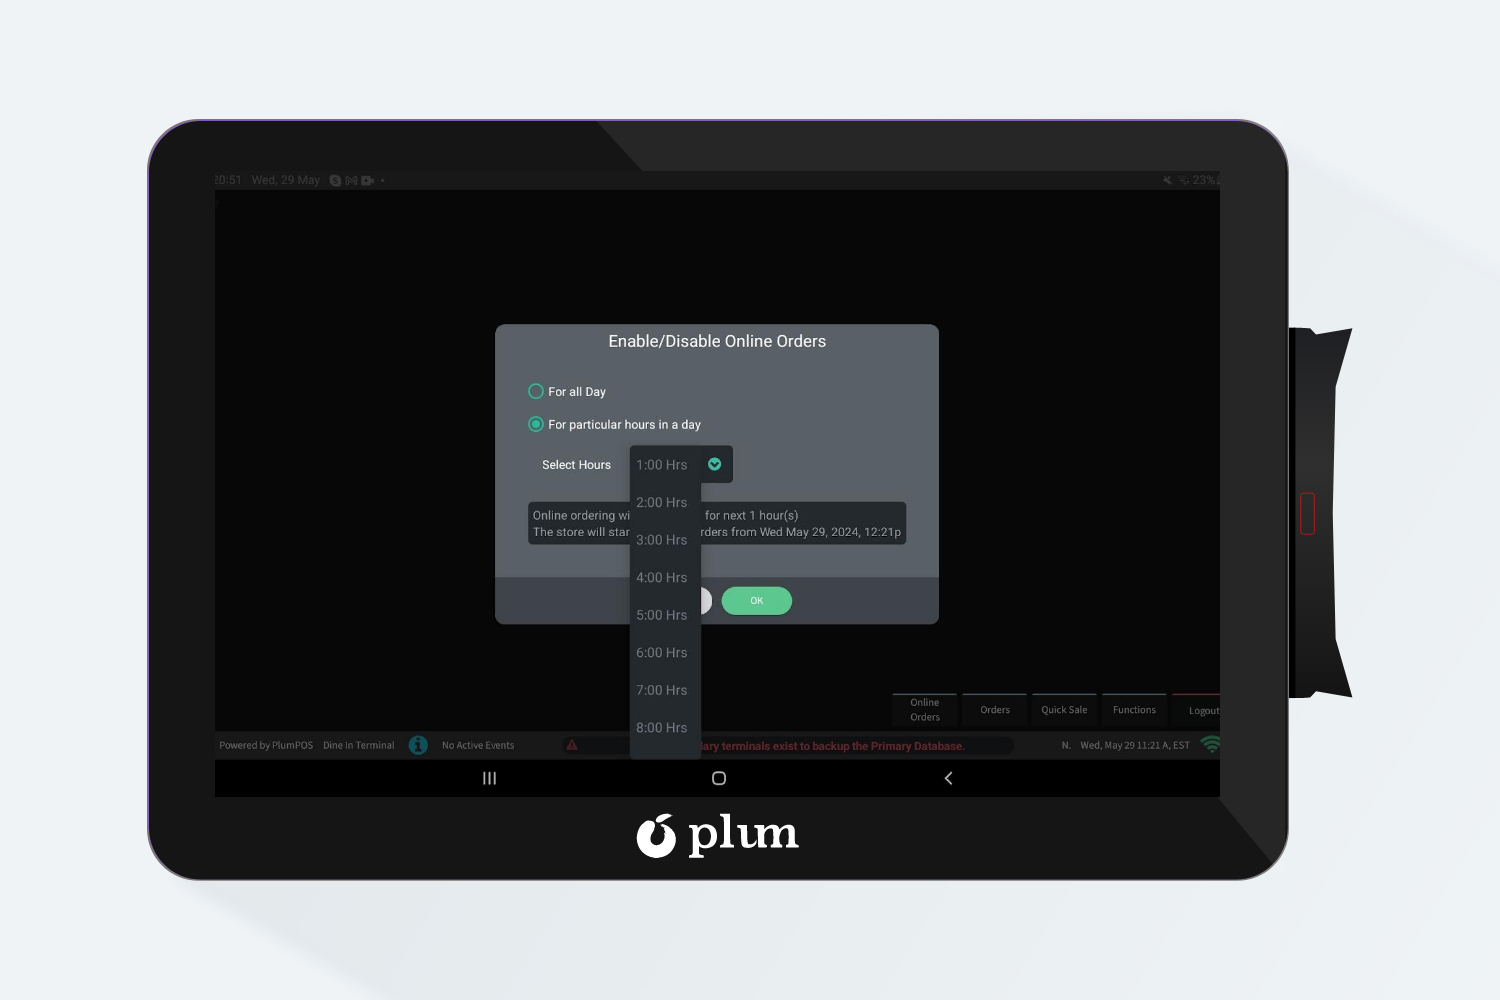

When we disable the online orders functionality on the device, the respective validation message becomes visible on the UI, and orders will not be received for the set duration.
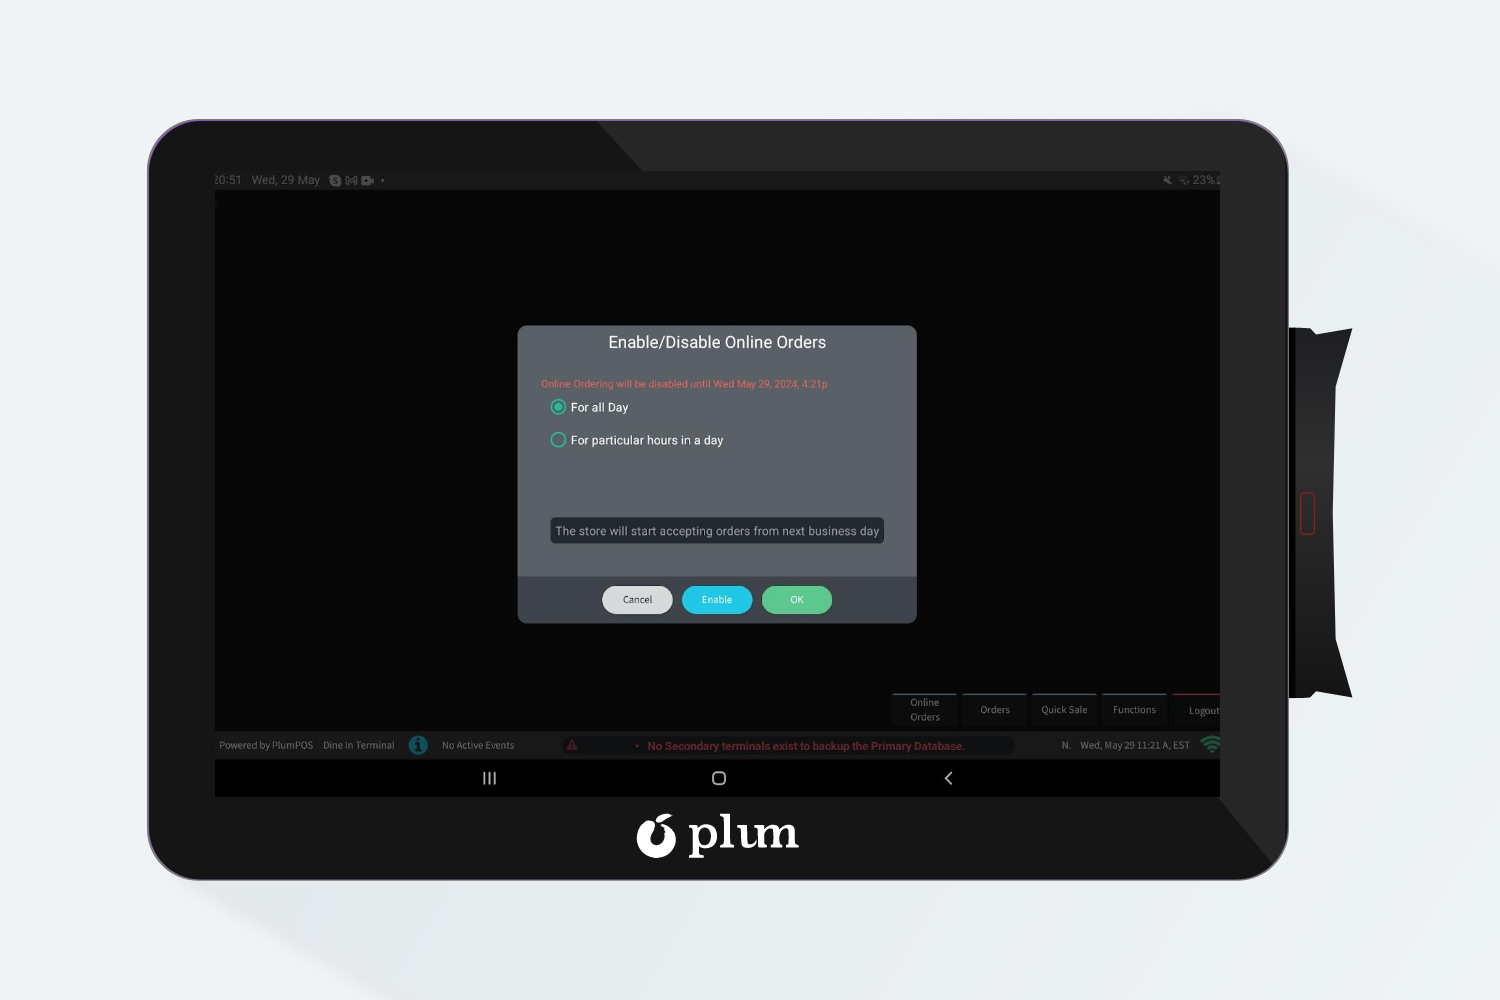
If the user wants to enable Online Orders again in Plum POS, they need to follow the same process as before by clicking the Enable button. Online orders will then start being received in Plum POS.